¶ Site
Specifically designed for managing site visitors, this feature allows admins to easily create visit plans, define site locations, and allocate visits with desired frequency. You can track the visitor’s route and location data, while visitors can log their visits with descriptions and screenshots. All submitted visit data is visible to the admin in real-time for monitoring and verification.
¶ Sites
The Sites feature is currently available only for premium customers and its available only in India. We are working on making it available in other countries soon.
- Navigate to the “Site” section from the left sidebar menu then select "Sites".
- Click on “+Add sites” button right side corner.
There are three key tabs at the top of the site details page:
Details – Basic site information and map.
Contact Details – Add contact person details for the site.
Settings – Customize site-related settings or preferences.
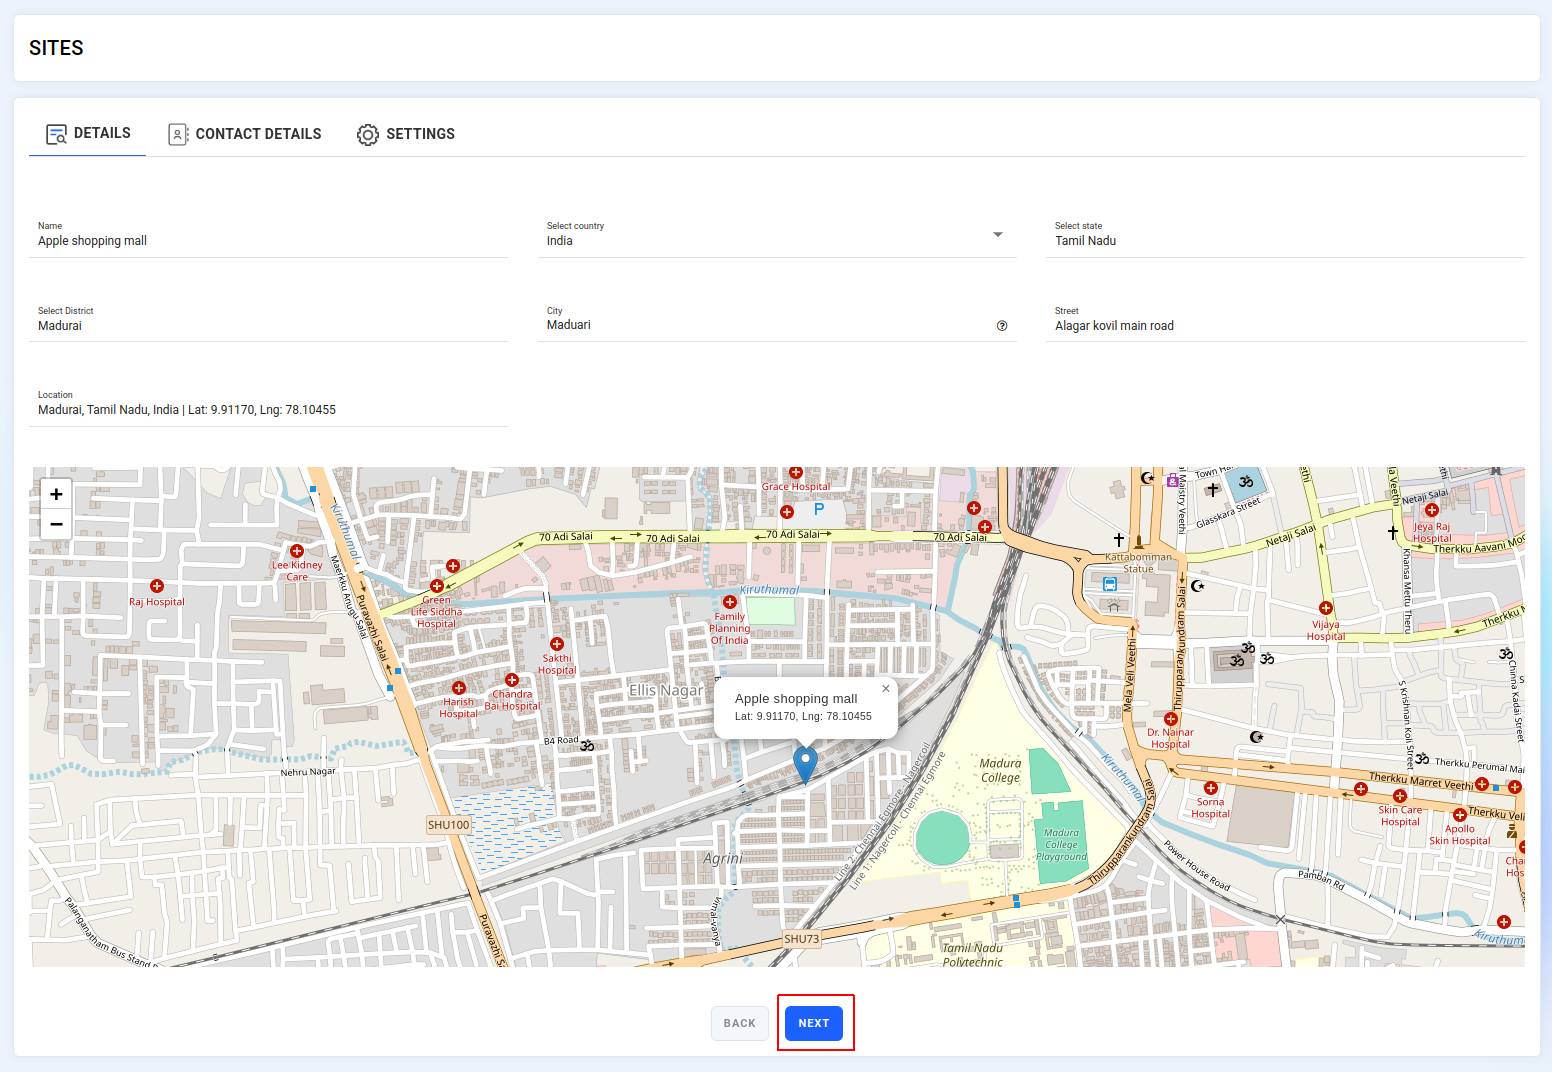
¶ Details
- Name : Enter the name of the site (e.g., Apple Shopping Mall).
- Select country : Choose the country (currently available for India only).
- Select state : Select the appropriate state (e.g., Tamil Nadu).
- Select district : Choose the district from the dropdown (e.g., Madurai).
- City : Type the city name (e.g., Madurai).
- Street : Enter the street address (e.g., Alagar Kovil Main Road).
- Location : Auto-generated coordinates (latitude & longitude) will appear here once you select the location on the map.
- Map : Select the site location directly on the map and you can also drag the marker to adjust the exact position if needed. The map will display a pinned marker at the selected location, along with the latitude and longitude coordinates. When you hover over the marker, a tooltip will appear showing the site name and its coordinates for quick reference.
- After entering site information in the details tab, click on the “Next” button.
- You will be redirected to the contact details tab.
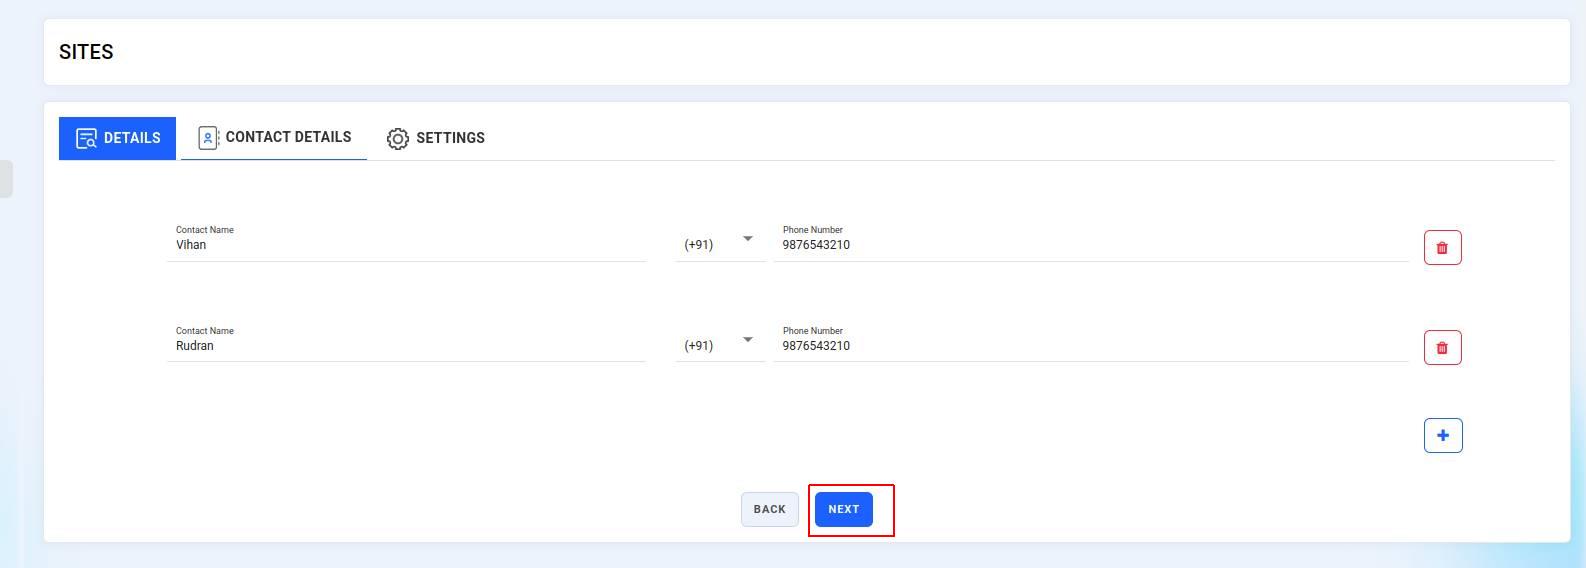
¶ Contact details
The Contact details section allows admins to add one or more points of contact for each site. These contacts help field employees and visitors coordinate effectively when arriving at or checking into a site.
- Contact Name : Enter the name of the site contact person (e.g., Vihan, Rudran).
- Phone Number : Enter the contact's mobile number (10 digits for India).
- To add more than one contact, click the “Blue plus (+) button” at the bottom-right corner. This will create a new row to enter additional contact details.
- Click the “Red trash bin icon” next to any contact entry to remove it from the list.
- Once all contact information is filled in, click the “Next” button to move to the Settings tab.
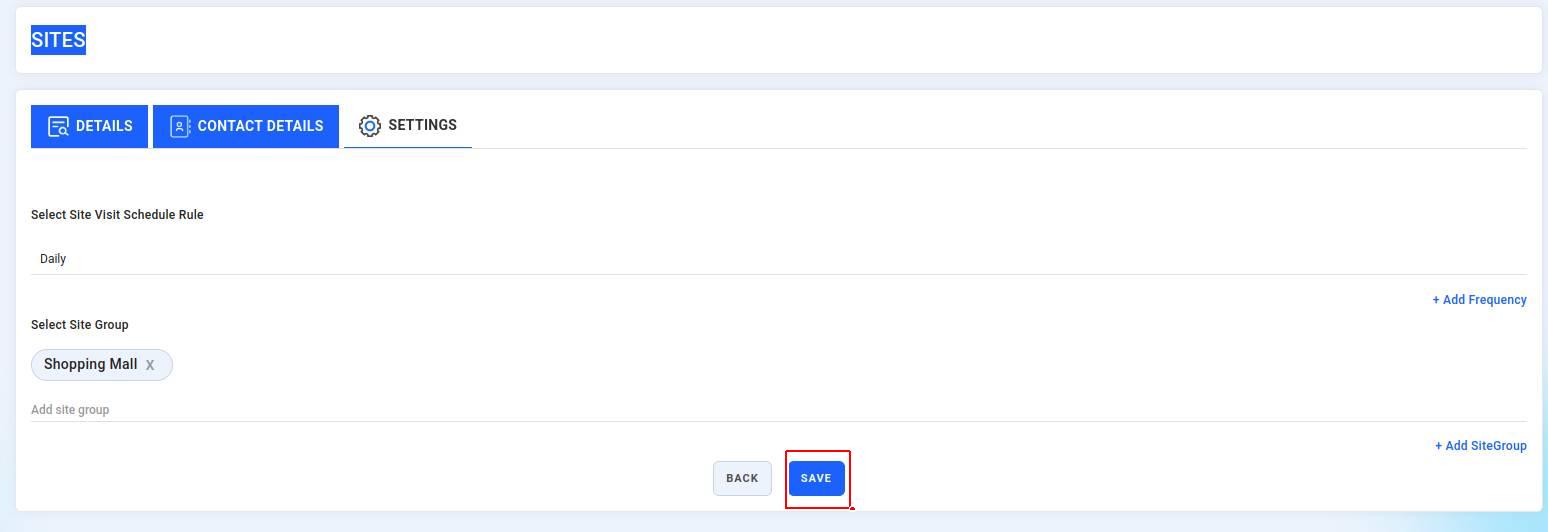
¶ Settings
Setting a clear visit rule ensures that field agents stay aligned with the expected visit routine. and site groups help in filtering, planning, and reporting across similar site types.
- Select site visit schedule rule : This option allows you to define how often the site should be visited, for example: Daily, Weekly, or Monthly.
- To add a new schedule, click on "+ Add frequency".
- Select site group : Use this field to group the site under a specific category. example: Shopping Mall
- You can also create or select a new group by clicking "+ Add site group".
- Once all fields are filled, click the “Save” button at the bottom right. This will complete the site setup and save it to your organization’s site list.
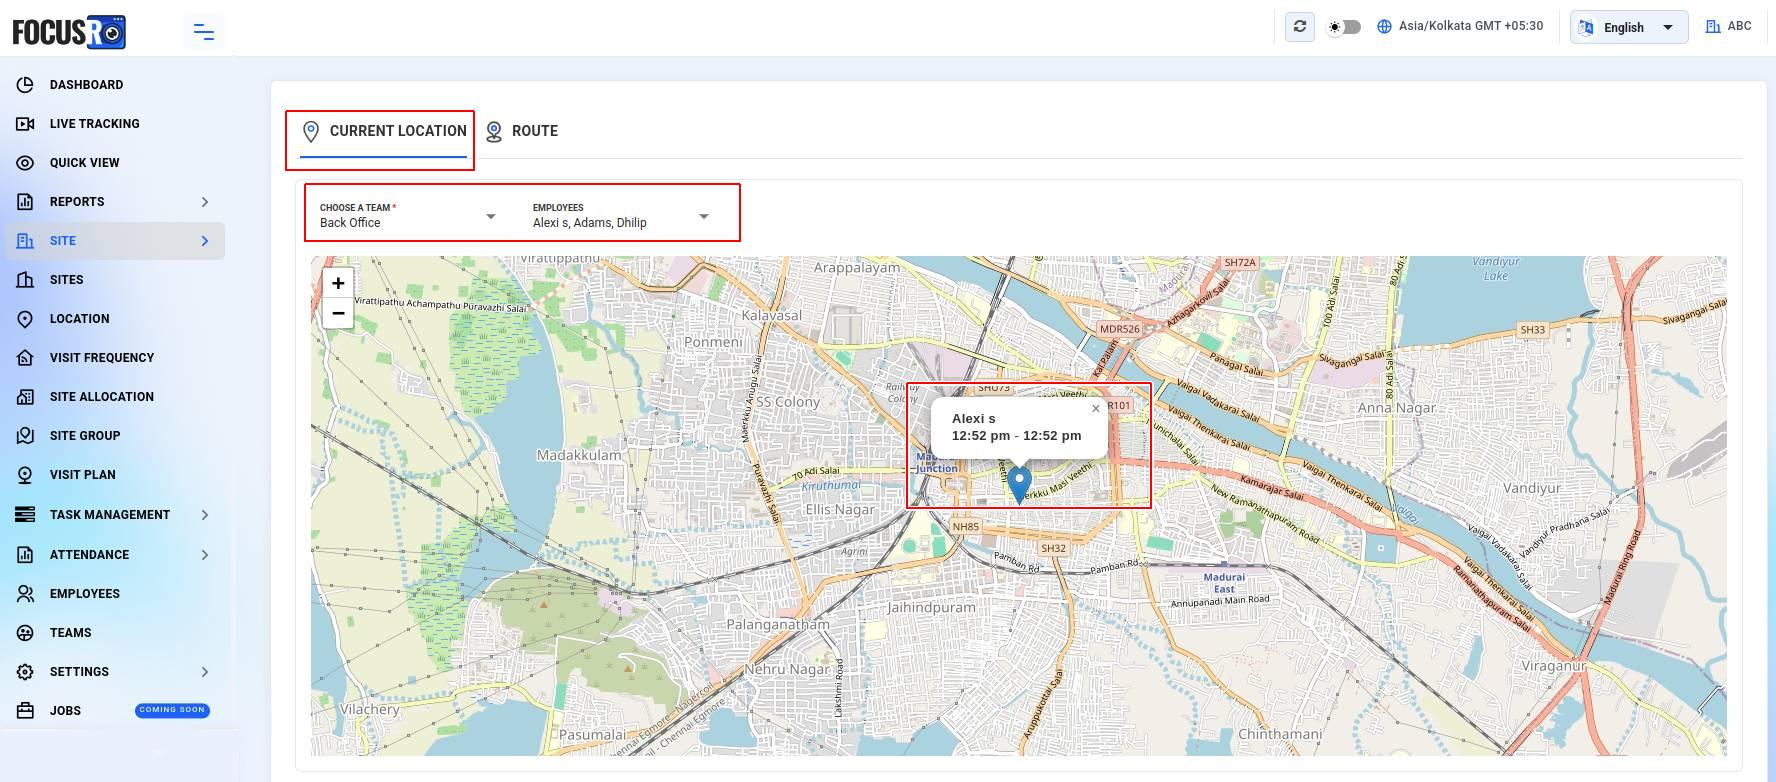
¶ Location
The location feature under the site module enables admins and managers to track the real-time current location of field employees on a map interface.
¶ Current Location:
- Here displays the live GPS location of selected employees.
- Hovering on the location pin reveals: "Employee name, Time stamp of location detection".
- Team & Employee filter: You can filter the view by selecting a specific team from the "Choose a team" dropdown and selecting one or multiple employees to monitor individually from the "Employees" dropdown.
Example : In the screenshot, Alexi S is shown on the map with a time log of 12:52 PM - 12:52 PM, confirming their GPS was active and logged at that timestamp.
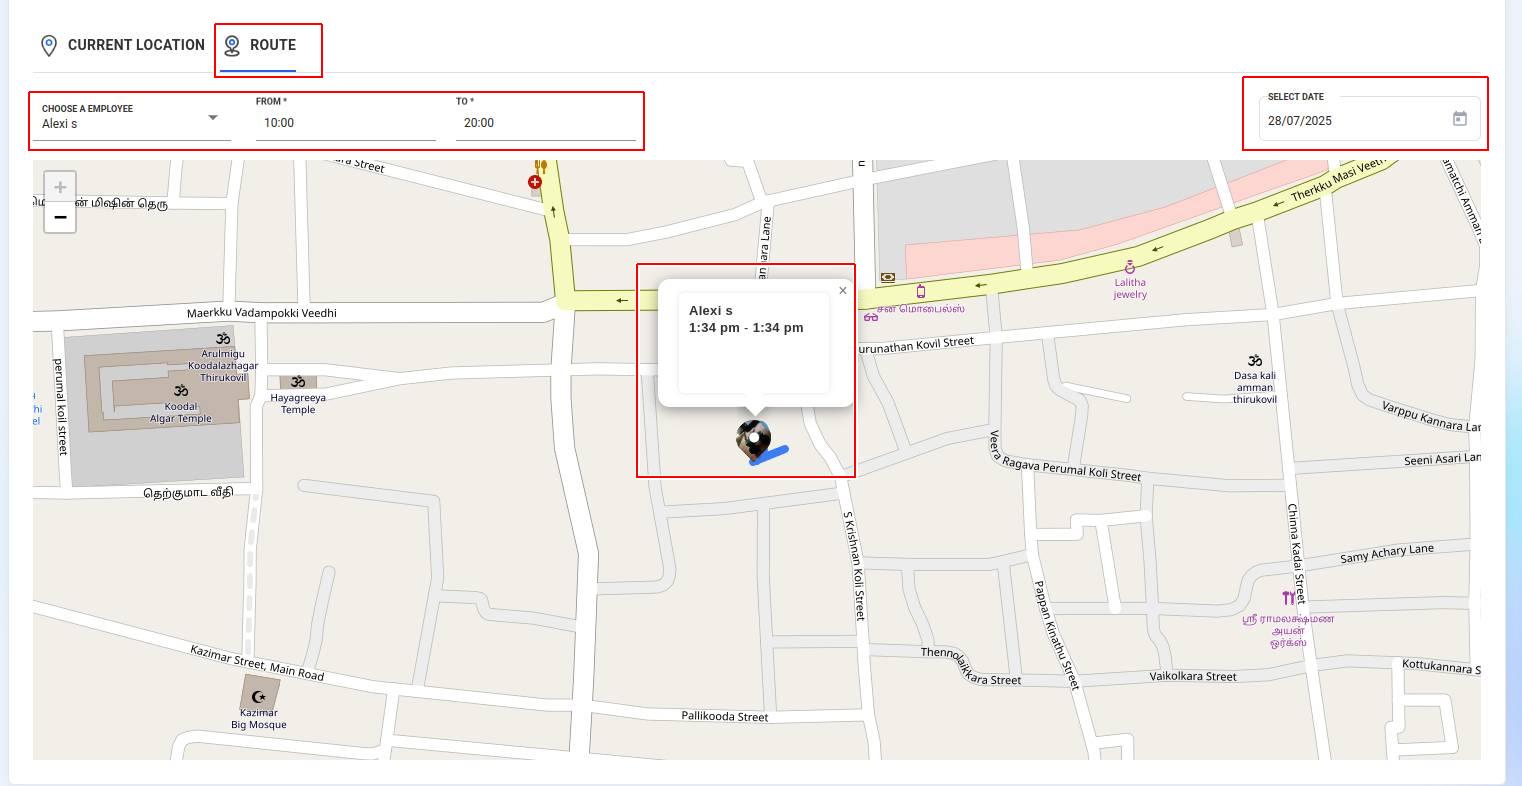
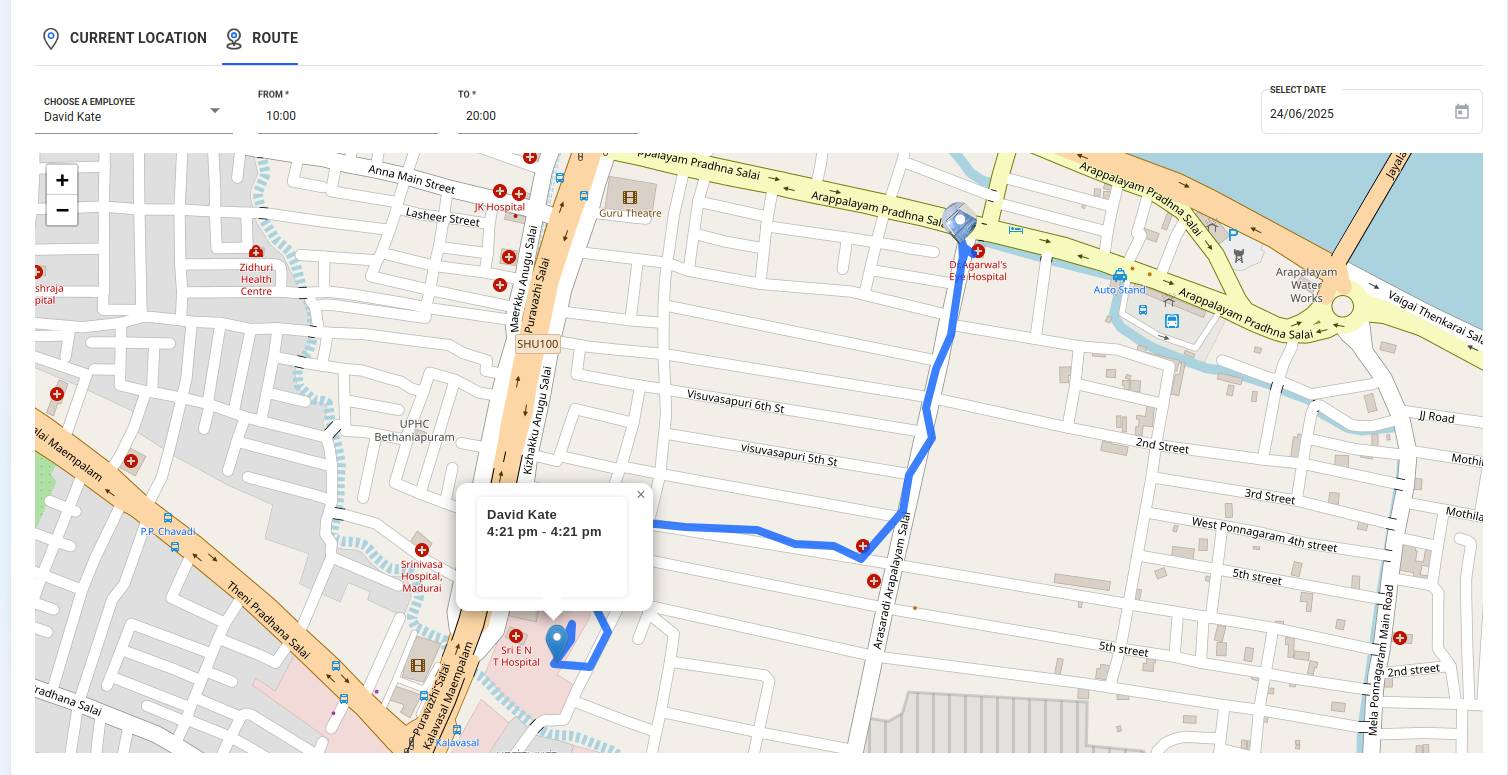
¶ Route
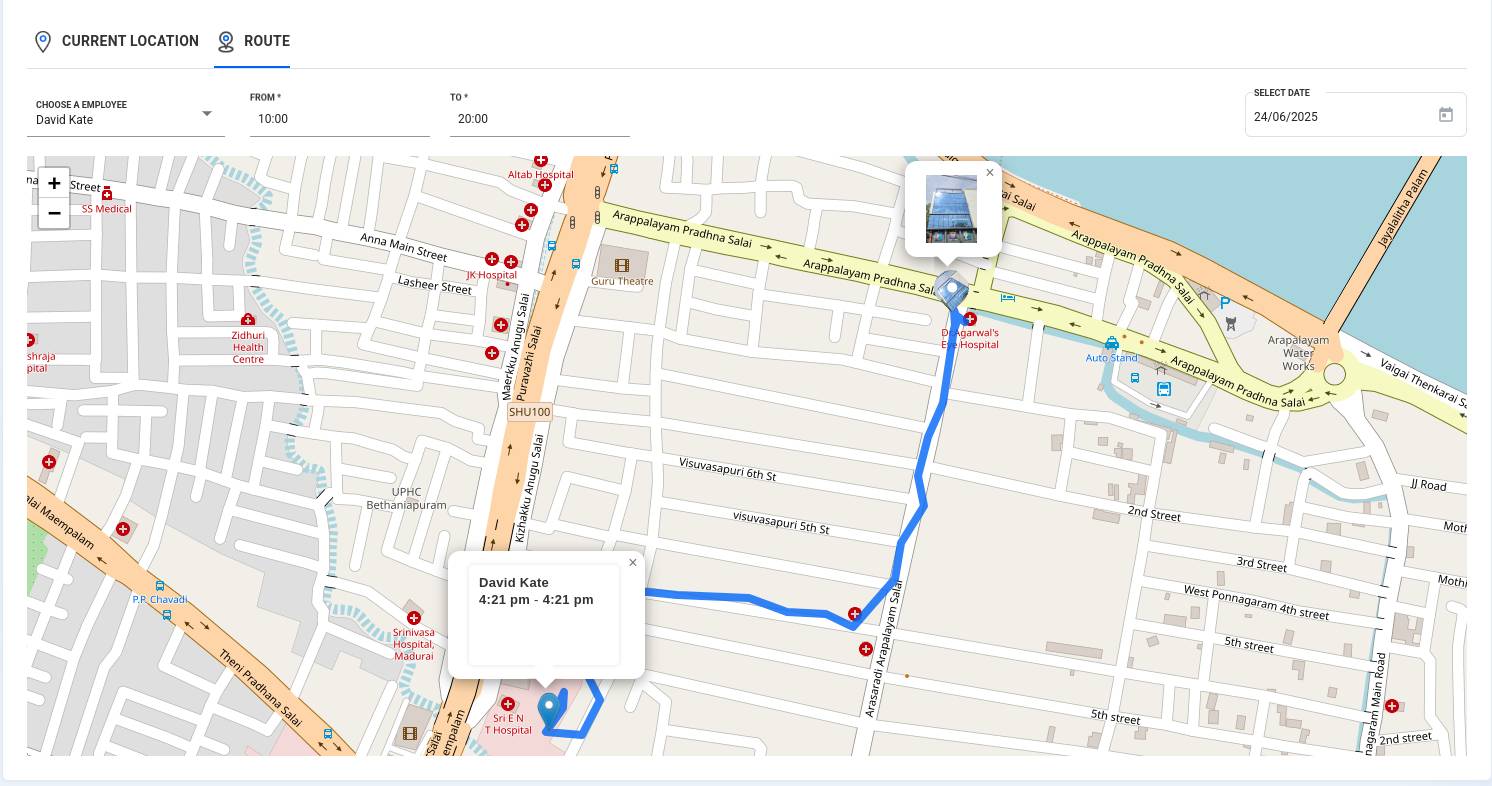
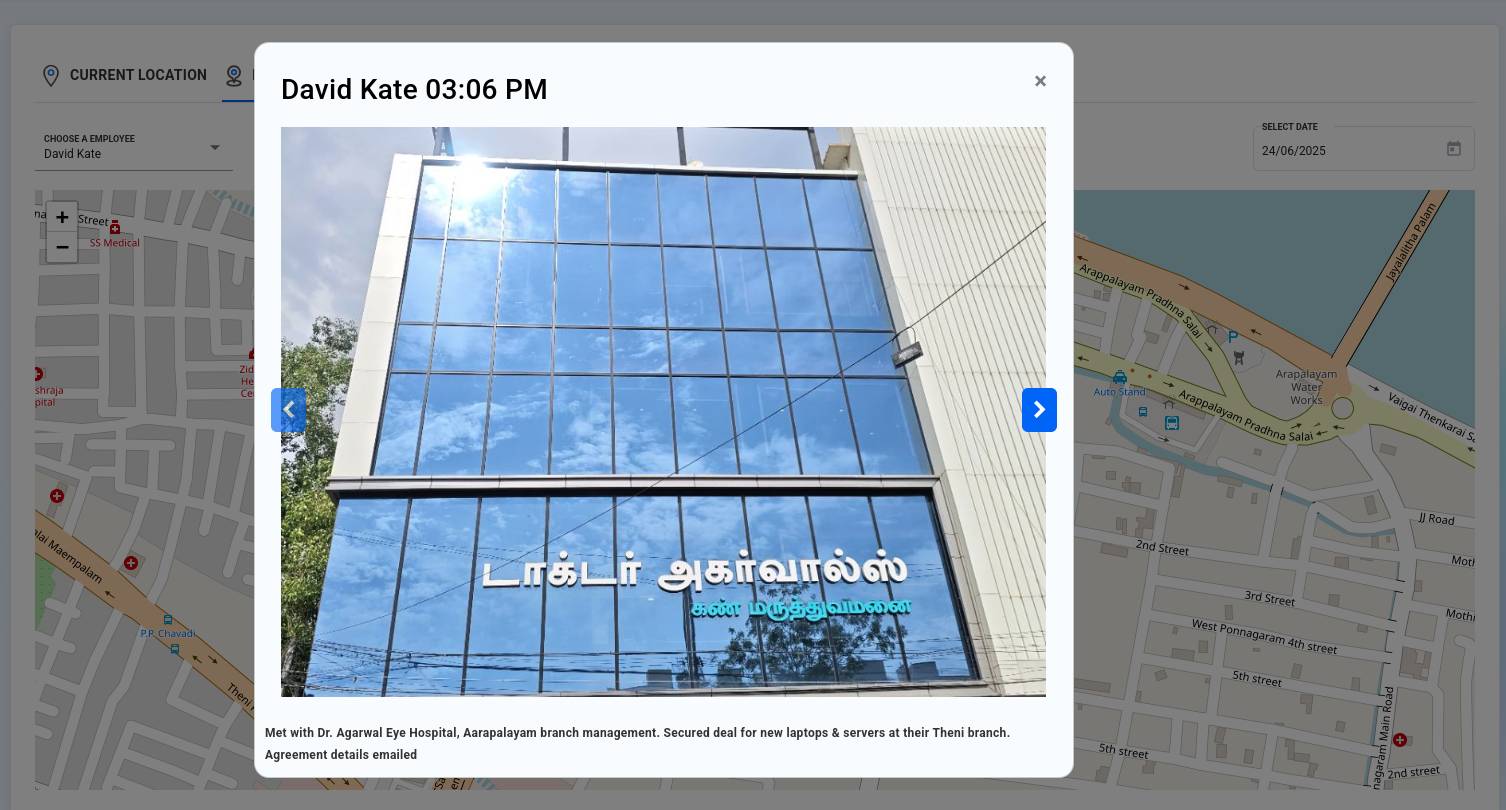
The Route tab allows you to trace an employee’s movement route for a selected date and time range. Any submitted site visit report with a selfie will be highlighted at specific pinpoints on the map, along with the complete route track for that day.
Choose an employee: Select a single employee whose route you want to view.
Time filter: Define the time window (e.g., from 10:00 to 20:00).
Select date: Choose the desired date to view the employee's route movement.
Route Indicators:
- The path traveled is marked with connecting blue highlited lines.
- Each marked point displays time of presence when hovered or clicked.
- Example. In the screenshot, the route shows Alexi S’s movement on July 28, 2025, with a log showing 1:34 PM to 1:34 PM at a specific location near kazimar street, madurai.
¶ Visit frequency
The Visit frequency feature in FocusRO allows admins to define how often employees are expected to visit their assigned sites. This ensures consistent monitoring and accountability for routine checks.
¶ Visit frequency view
From the main Visit frequency screen, you can view all active visit schedules that have been created.
Name : The label of the visit frequency (e.g., Daily, Weekly, Monthly)
Frequency : Defines the interval at which visits should occur
Unit : Unit of time used (Day, Week, Month)
Status : Shows whether the schedule is currently active
Action : You can edit existing schedules using the Edit button
All active frequencies are listed here for easy management.
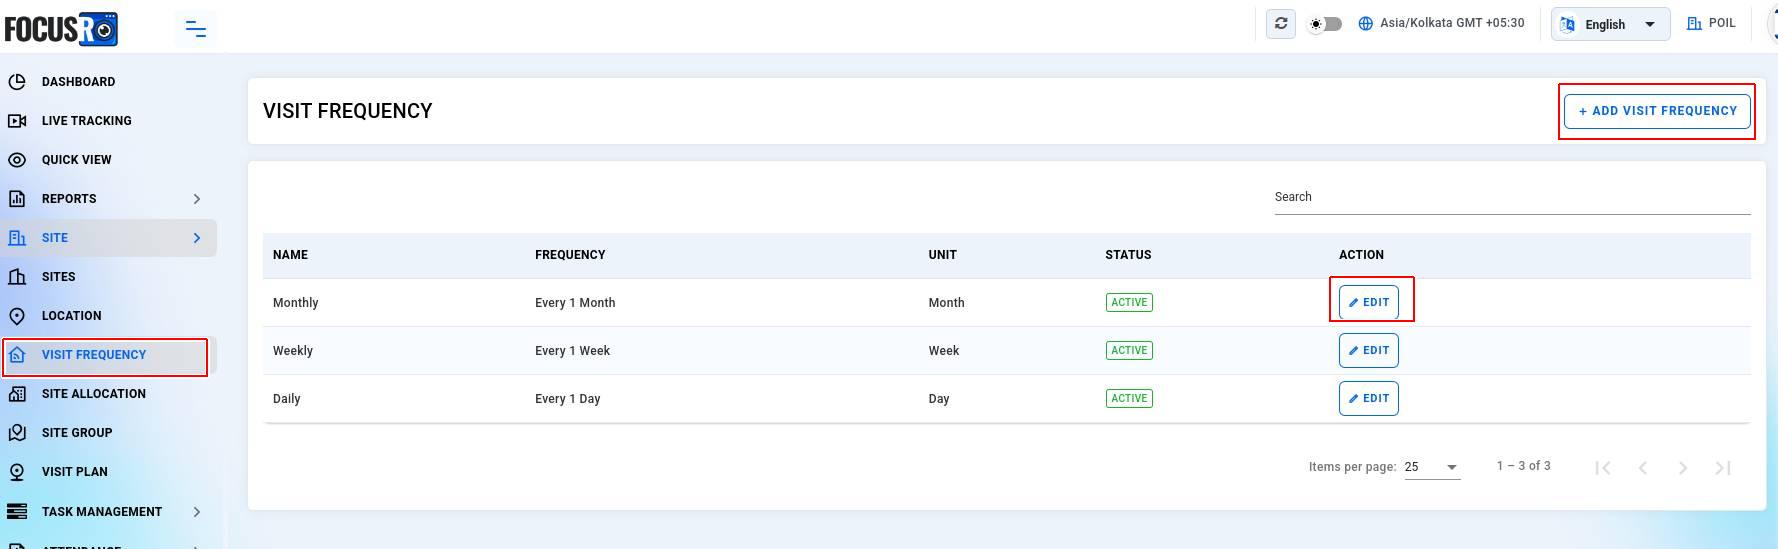
¶ + Add visit frequency
To create a new visit schedule, Click on + Add visit frequency (top-right corner).
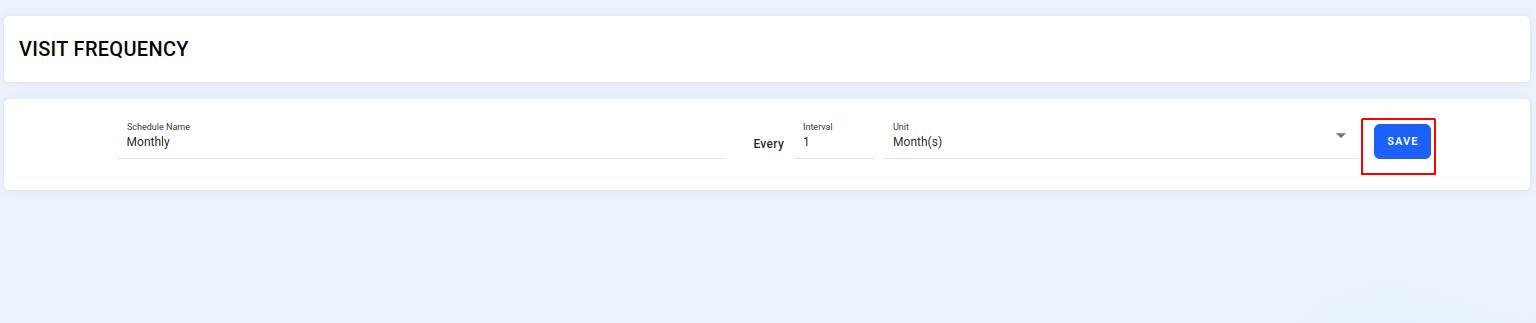
Fill in the following fields:
- Schedule Name – Label your schedule (e.g., “Biweekly Check”)
- Every – Enter the interval number (e.g., 1)
- Unit – Choose the time unit (Day(s), Week(s), Month(s))
- Click "Save" to apply.
Example: Creating a schedule named "Daily" with Every = 1 and Unit = Day(s) means the employee is expected to visit the site once every day.

¶ Editing an Existing Frequency
Click the "Edit" button next to any active schedule.
You will be taken to a screen where you can:
- Rename the schedule.
- Modify the interval or unit.
- Click “Save” to update changes.
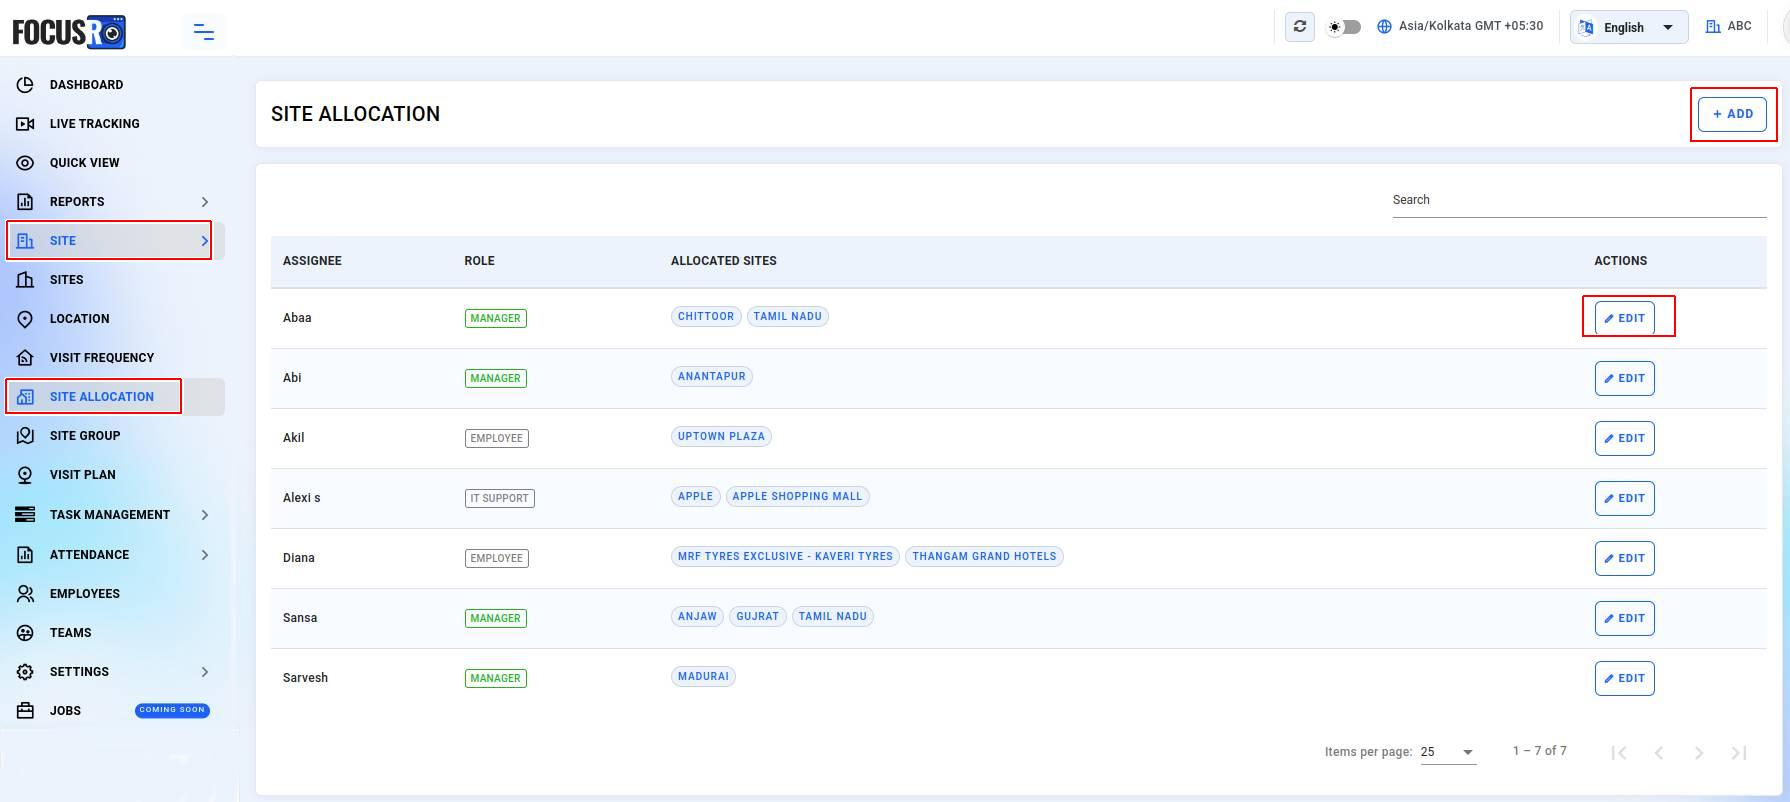
¶ Site allocation
Site allocation feature provides step-by-step instructions for allocating and managing site assignments for employees and managers.
- Navigate to “Site” from the leftside menubar and click on “Site allocation”
- Click on the "+ Add" button on the top right corner of the site allocation page.
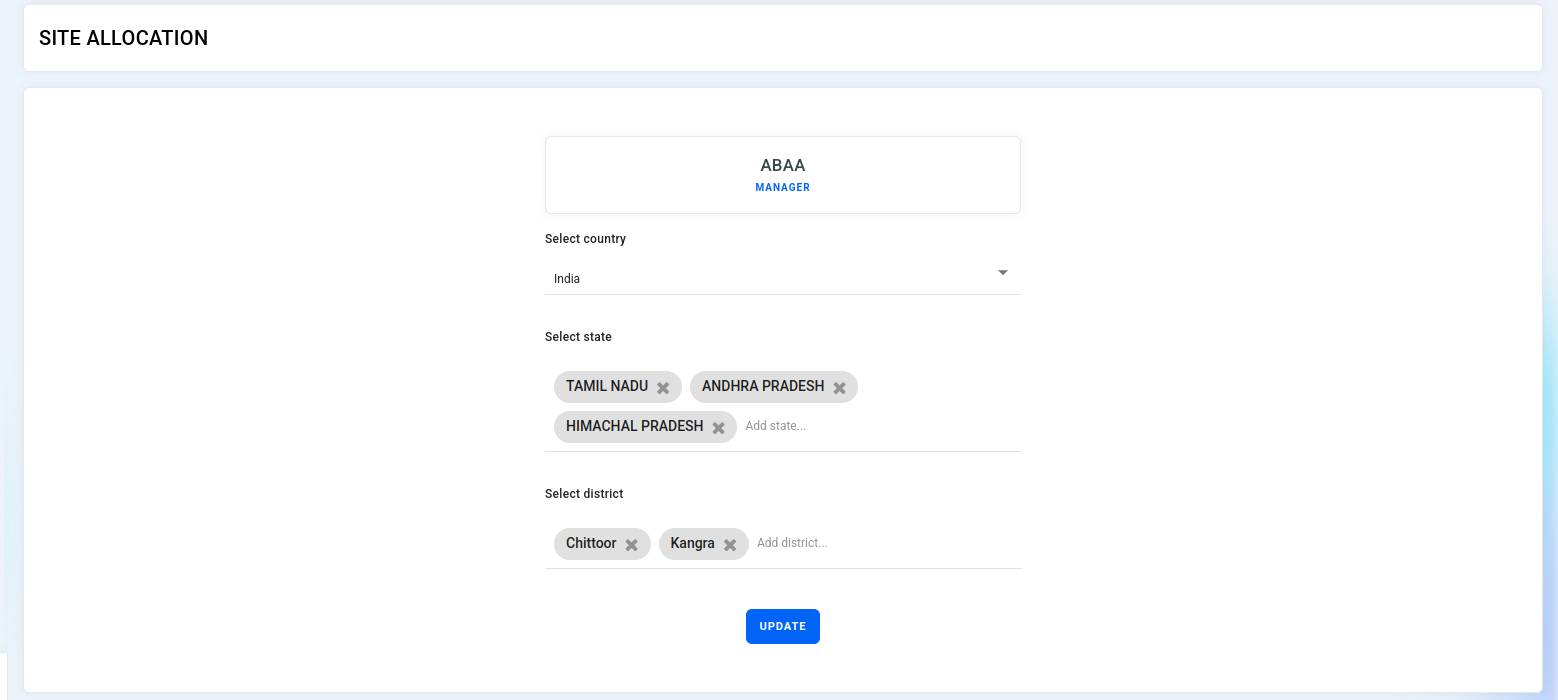
¶ Site allocation for manager
- In the search box, start typing the employee/manager's name, email, or contact number. and select the correct user from the dropdown suggestions.
- Country: Select the country (e.g., India).
- State: Choose the relevant state(s) (e.g., Himachal Pradesh).
- District: Select the appropriate district(s) (e.g., Kangra).
- Once completed, click "Save" to confirm the allocation.
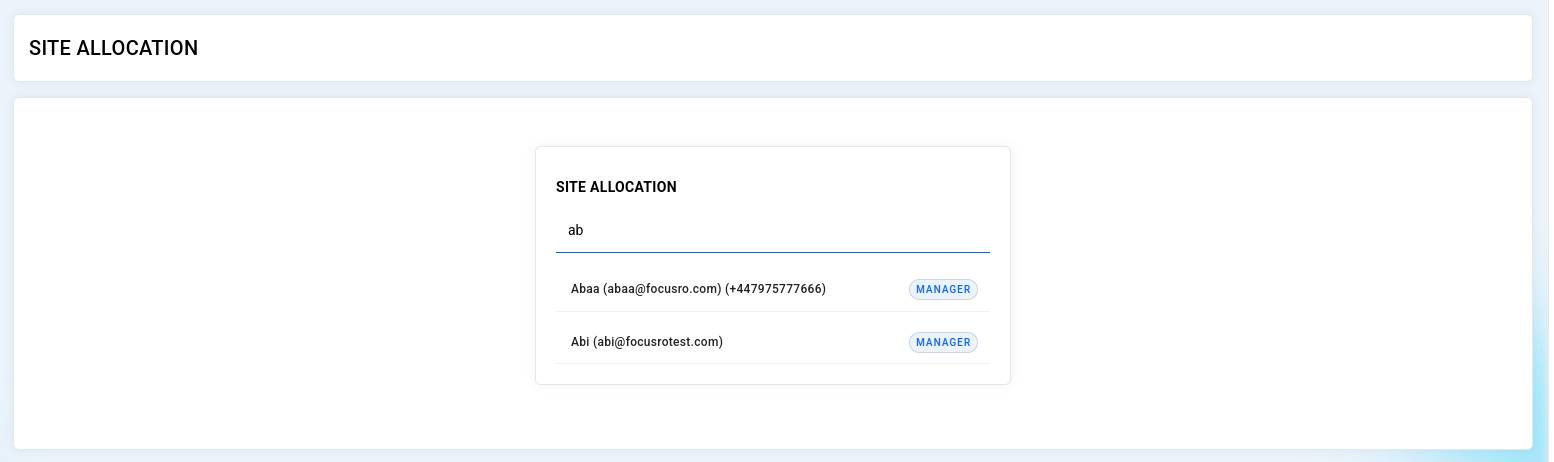

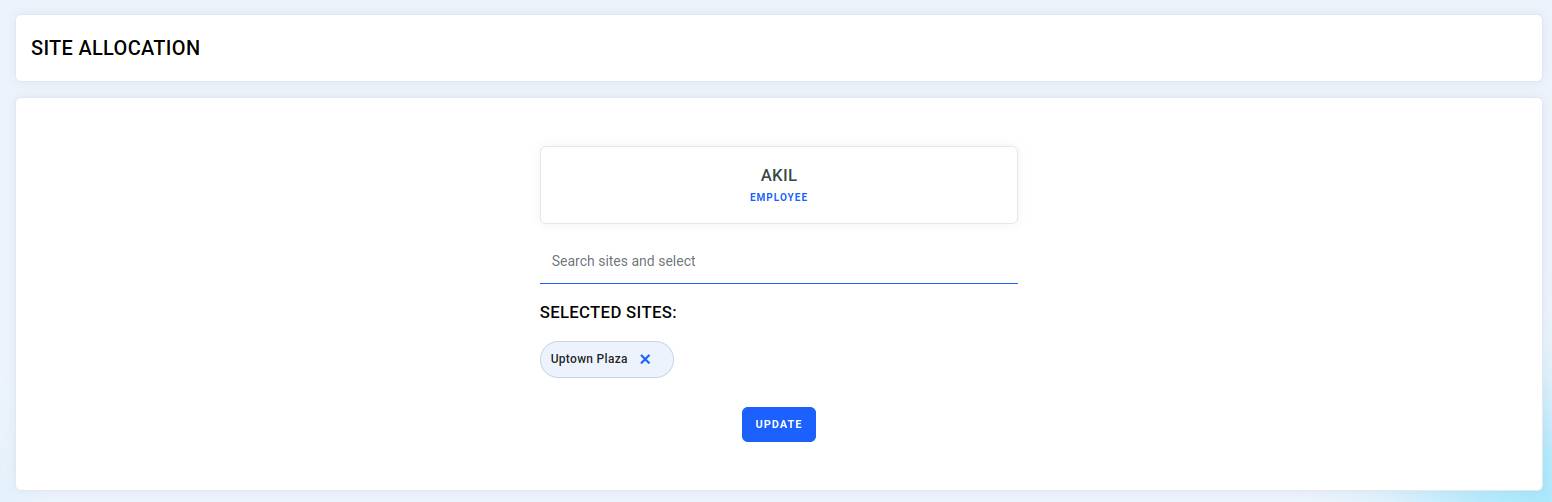
¶ Site allocation for employee
- In the search box, start typing the employee/manager's name, email, or contact number. and select the correct user from the dropdown suggestions.
- Search and allocate the site for the user
- Once completed, click "Update" butten to save the allocation.
¶ Edit Allocated Employee Sites
- Click the “Edit” button next to the name of the user you want to update.
- The selected user’s information will be display name (e.g., ABAA), role (e.g., Manager), and allocated country (e.g., India).
- Select state: This field shows the list of states currently assigned to the user (e.g., Tamil Nadu, Andhra Pradesh, Himachal Pradesh).
- To remove a state, click the ‘✕’ next to its name.
- To add a new state, click the field and choose from the dropdown list.
- Select district: This field displays the current districts assigned to the user (e.g., Chittoor, Kangra).
- To add new districts, select them from the dropdown.
- To remove a district, click the ‘✕’ beside its name.
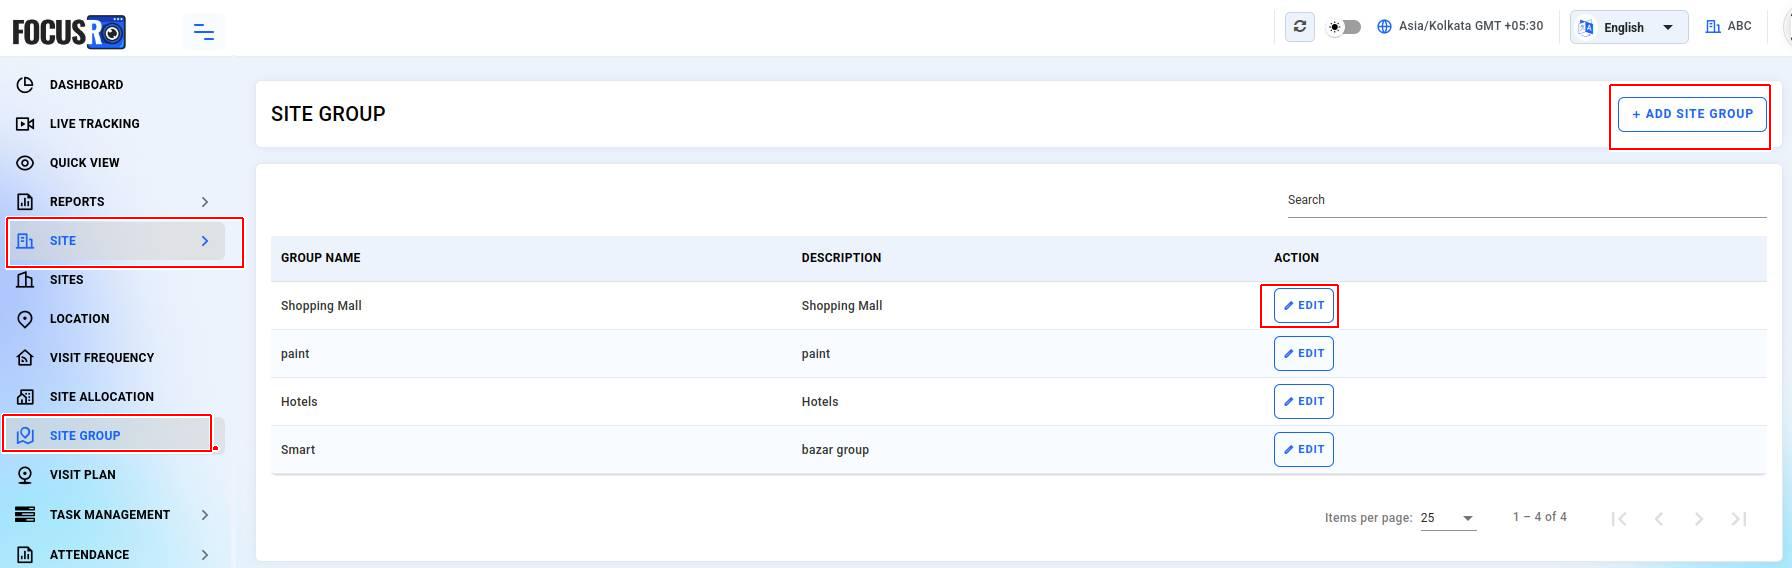
¶ Site group
The site group feature allows users to categorize and manage multiple sites under unified groups. This simplifies site tracking, planning, and reporting by logically organizing related locations (e.g., malls, hotels, or retail outlets).
- Navigate to “Site” from the leftside menubar and click on “Site group”
- Click on the "+ Add site group" button on the top right corner of the site group page.
Fill in the following fields:
- Name (required): The title of the group (e.g., "Retail Chain").
- Description (optional): A short description or identifier (e.g., “North zone malls”).
- Click “Save" to create the site group.

- To edit site group, on the site group list page, click the “Edit” button next to the group you want to update.
- The “Name” and “Description” fields will be editable.
- Make your changes and click “Save”.

¶ Visit plan
The site visit plan feature simplifies the scheduling and monitoring of visits, helping employees stay organized and ensuring timely completion. Use this tool to efficiently manage your field operations.
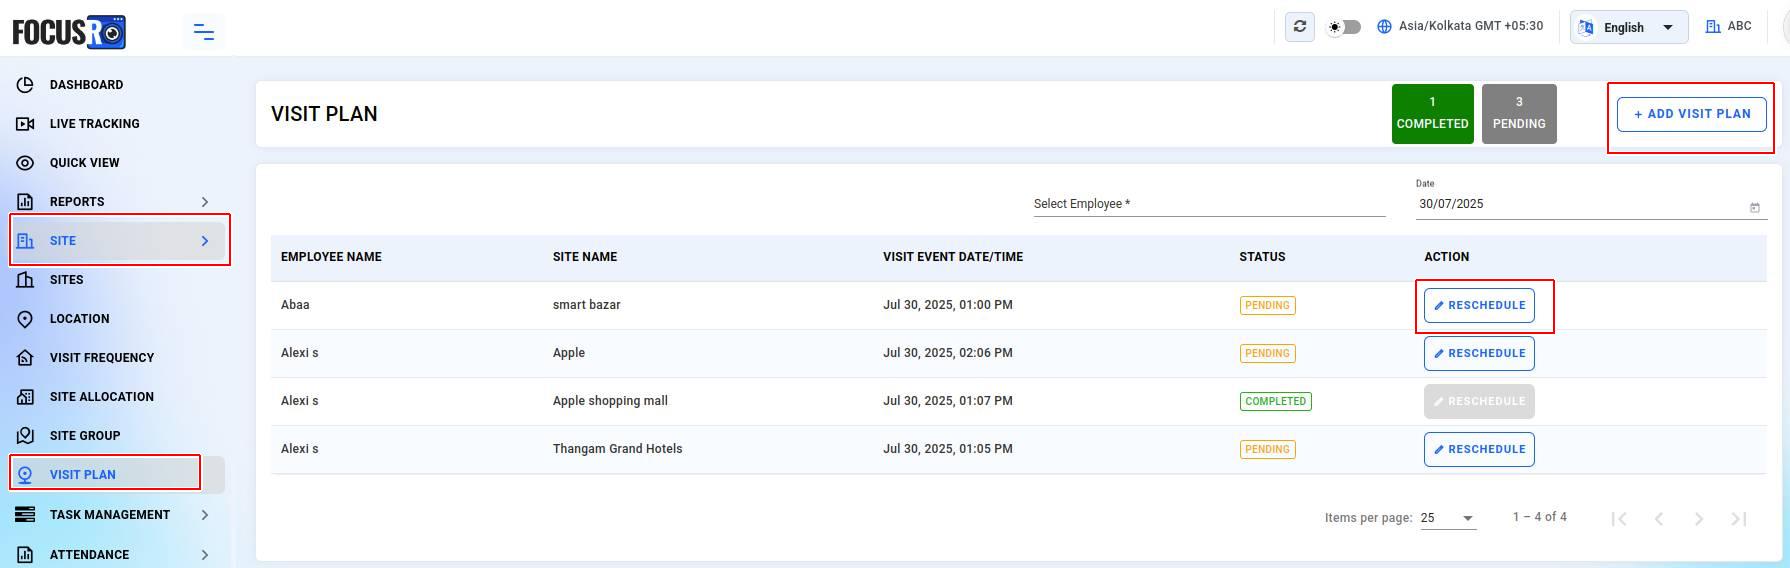
¶ To Add a new visit plan
- Navigate to “Site” from the leftside menubar and click on “Visit plan”
- Click the "+ Add visit plan" button in the top right corner. and fill in the following fields:
- Employee name : Choose the employee assigned for the visit.
- Site name : Select the site to be visited from the dropdown menu (e.g., Smart Bazar).
- Visit date : Pick the date for the visit.
- Visit time : Choose the time slot for the visit.
- Once all the details are filled in, click the “Save” button to finalize the plan.

¶ Reschedule visit plan
You can reschedule a visit by clicking the “Reschedule” button in the action column. This will allow you to modify the visit date and time.