¶ GENERAL SETTINGS
These settings apply organization-wide. Any changes made here will affect all employees within your organization.
¶ Enable screenshots
- Navigate to "General" on the left-hand side menu settings.
- By default, the "Capture screenshots" option is in enabled, allowing you to capture employees' activity directly from their screens.

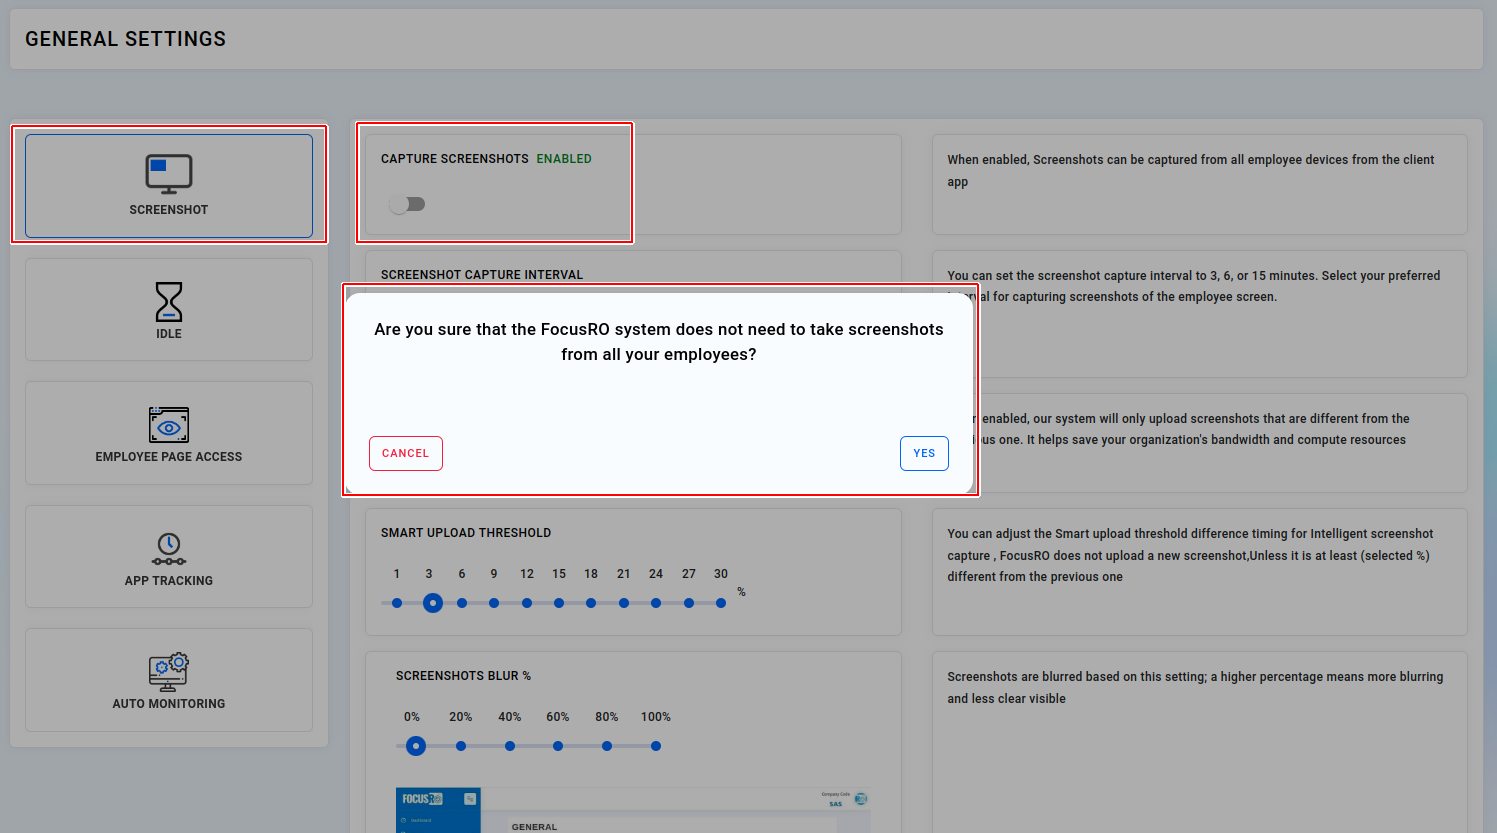
¶ Disable screenshots
- You can turn off the screenshot capture mode if needed.
- If you try to disable screenshots, a warning alert will appear. Click the "Yes" button to confirm. Once disabled, no screenshots will be taken from your employees' screens, these settings apply organization-wide.
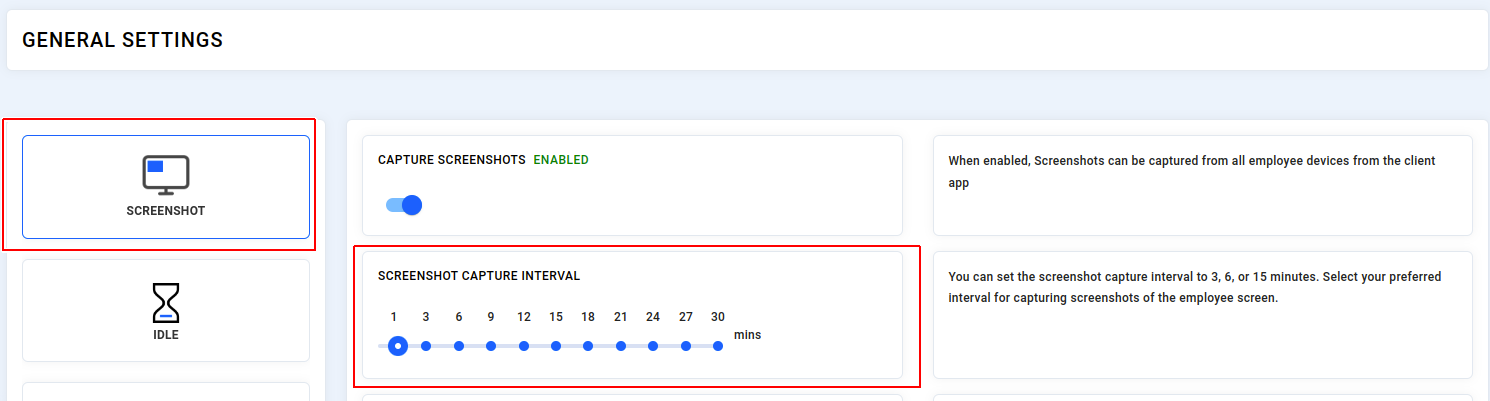
¶ Customizing frequency values of screenshot
- You can customize the frequency values of screenshots to 3, 6, 9, 12, and 15 mins. Choose your preferred frequency to take a screenshot of the employee screen.
¶ Intelligent screenshot capturing
Intelligent screenshot capturing - if an employee's screen remains unchanged for a few minutes, the FocusRO system captures the screen and compares it with the previous one. If there are no differences, it registers this as idle time and uploads reports to the dashboard.
- When enabled, FocusRO will only upload screenshots that are different from the previous one, it helps save your organization's bandwidth and compute resources.
- When disabled, our system will capture and upload all screenshots even if they are the same as the previous one.
- You have the option to personalize the “Smart Upload Threshold Difference” and adjust the timing parameters for Intelligent Screenshot Capture. This % determines how much visual difference between each screen would be considered a new one, higher number will result in less number of screens captured.

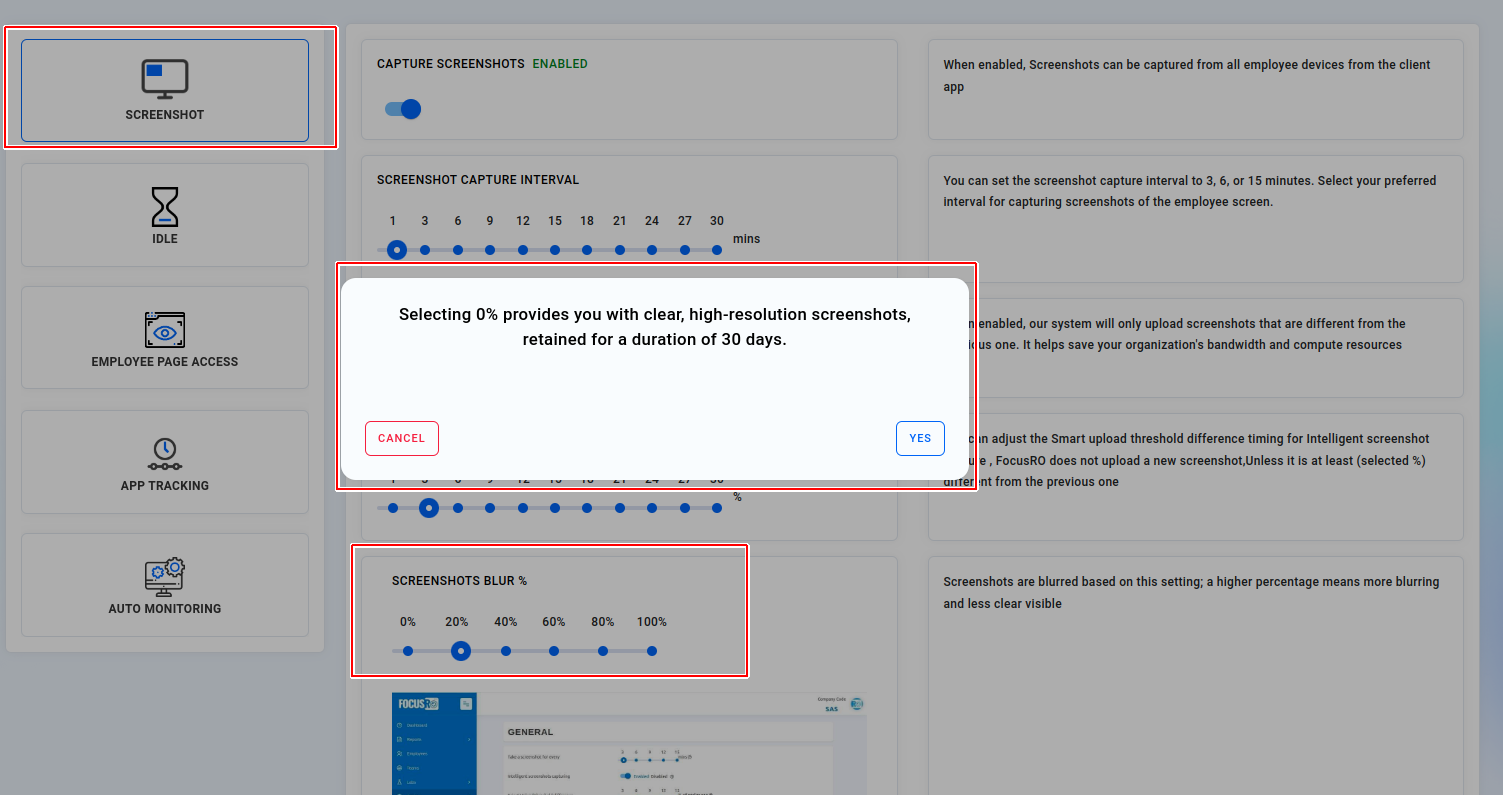
¶ Screenshot's blur percentage
- 0% Blur Percentage: Setting the blur percentage to 0% ensures that your screenshots are captured in their original, high-resolution quality with no blurring. This provides you with the clearest and most detailed images possible.
- Retention Duration: Screenshots captured with a blur percentage of 0% are retained for a period of 30 days. After this period, they will be automatically deleted to maintain system efficiency and privacy.
- Blur Percentage 20% to 100% : As you increase the blur percentage, the screenshots become progressively more blurred. This means less detail and clarity are visible in the captured images. and the screenshot retained for a period of 90 days
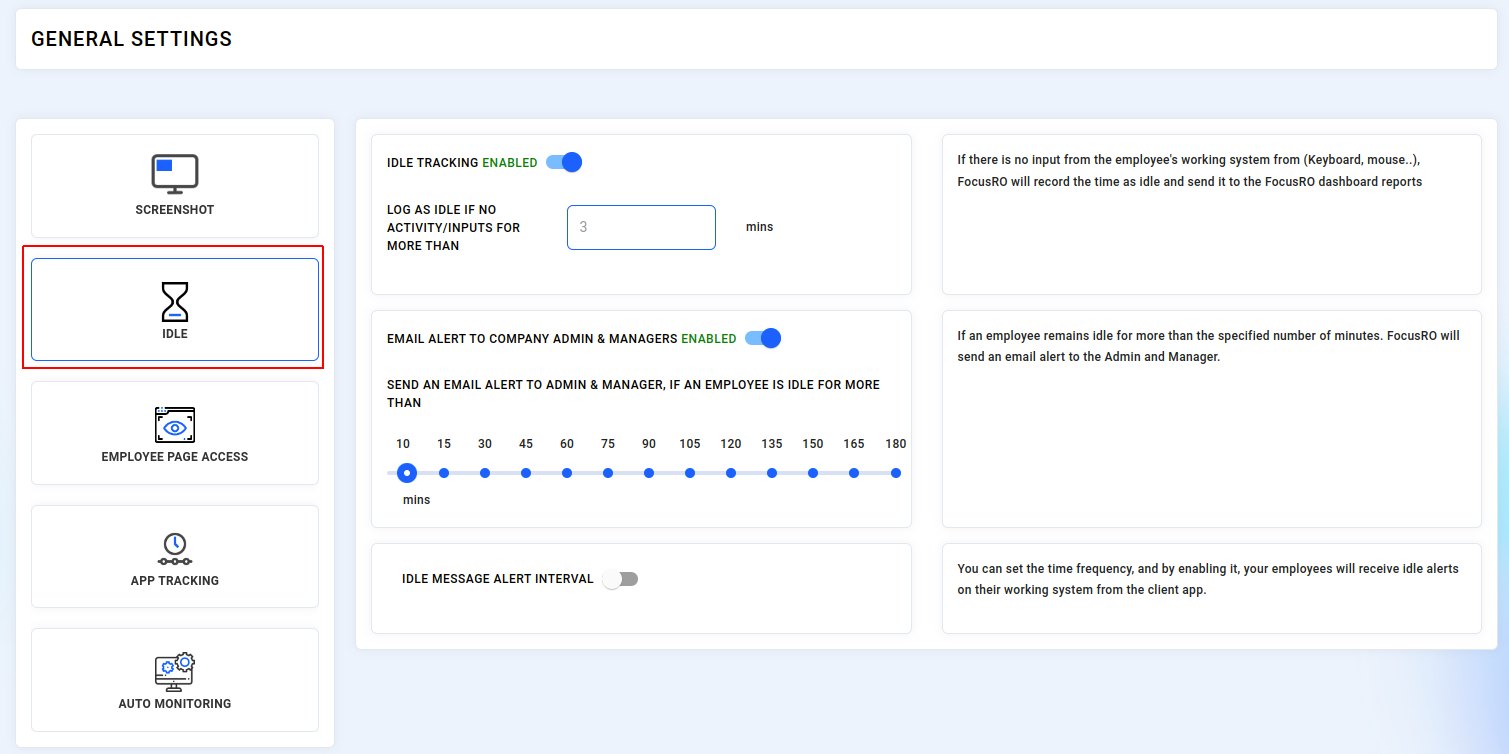
¶ Idle tracking
"If there is no input from the employee's working system(Keyboard, mouse..), FocusRO will record the time as idle and will send an alert notification email to admin/managers.
- You can activate or deactivate the “Idle flag”, which detects screen inactivity lasting over a specified minute.
- Your changes are automatically saved upon toggling the flag using the button.
- Customize the "Log as idle if no activity/inputs for more than a few minutes" option: If an employee's screen remains unchanged for the specified duration, it will be recorded as idle time, and the idle duration will be sent to the dashboard."
- Disabling this flag prevents idle time tracking for all employees across your organization.
- “Email alert to company admin & managers” - Enabling this option notifying them of employee idle time.
- You have the ability to customize the specified time for "Sending idle alerts to administrators and managers".
- By enabling “Idle message alert interval” your employees will receive alert notifications in the client app on their system.
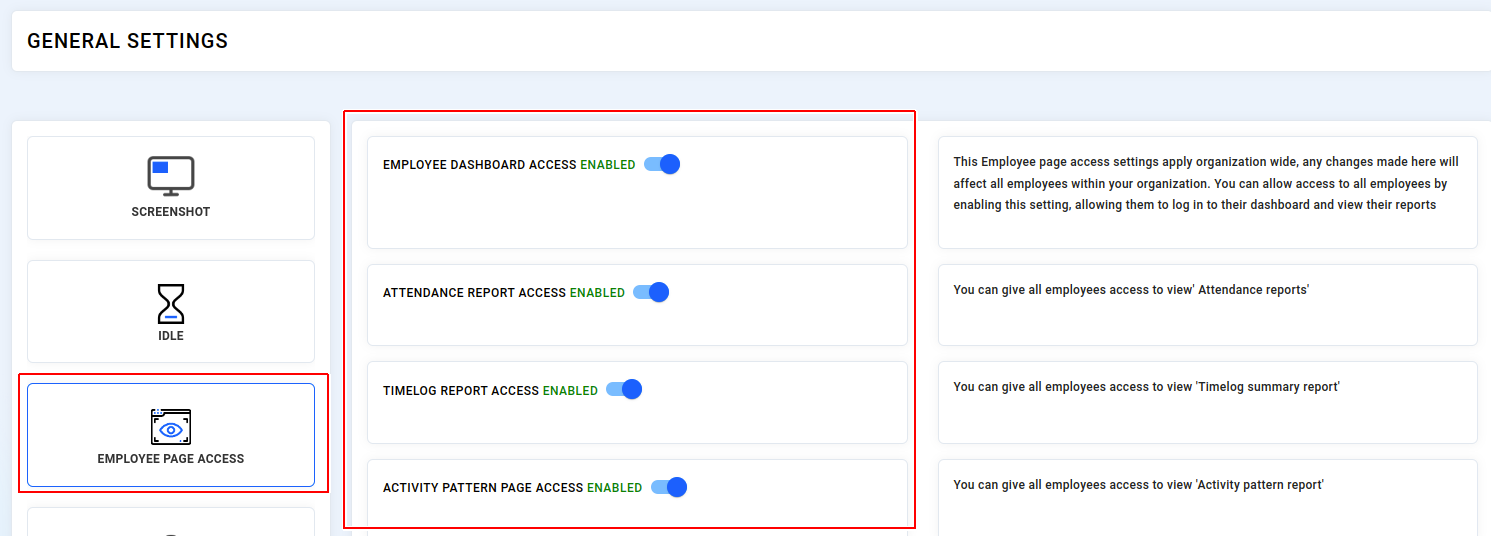
¶ Employee page access
This Employee page access settings apply organization-wide. Any changes made here will affect all employees within your organization.
- You can provide access to all your employees, allowing them to log in to their dashboard to view their reports, including Employee Dashboard Access, Timelog Summary, Activity Patterns, and Attendance Reports.
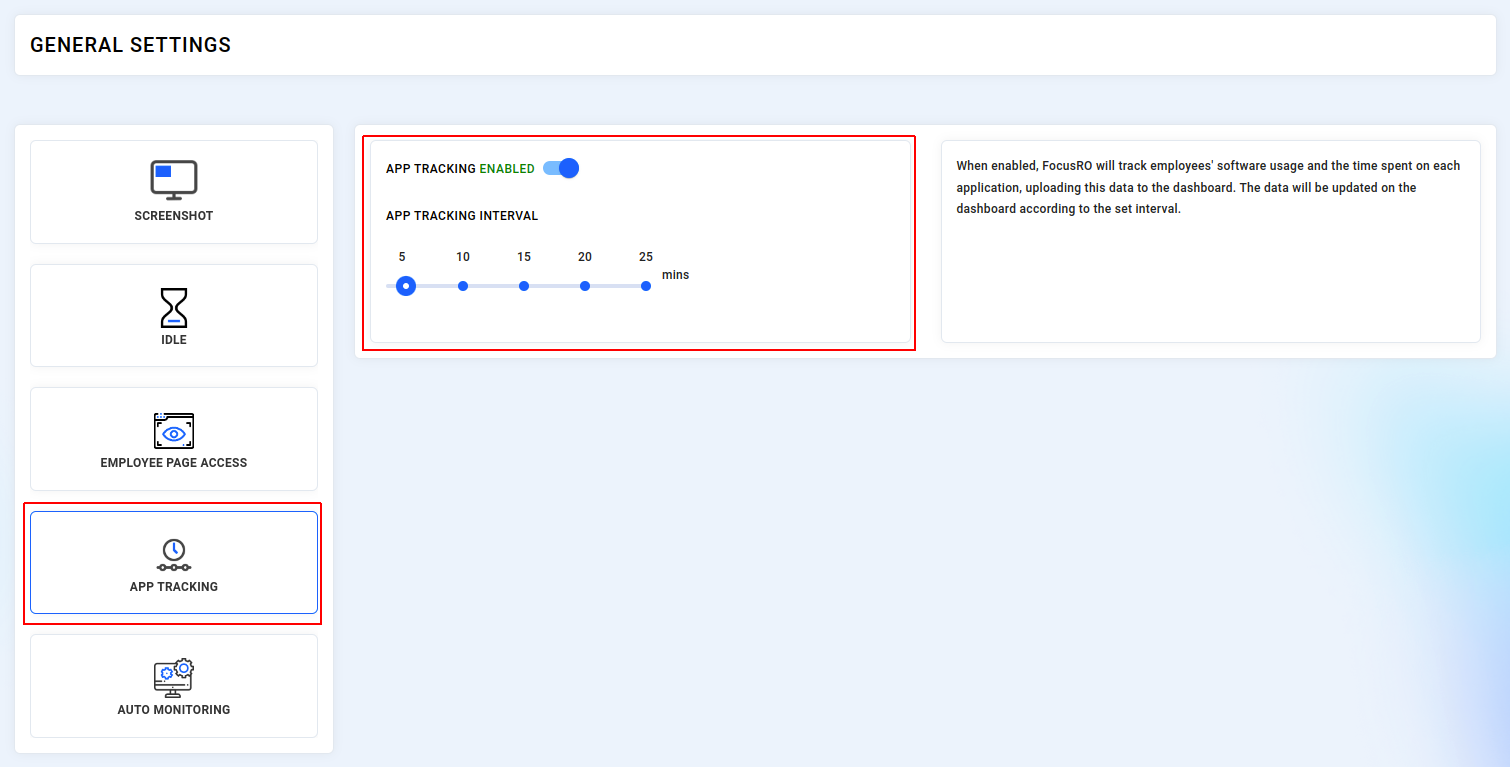
¶ App tracking interval
- When enabled, FocusRO will track employees' software usage and the time spent on each application, uploading this data to the dashboard. The data will be updated on the dashboard according to the set interval.
- When disabled, FocusRO will not track or upload employees' software usage and time spent on each applications.
¶ Auto monitoring
- As an administrator, you now have the capability to manage monitoring options more effectively with the new auto-monitoring feature. Here’s a overview:
- Auto-Monitoring Feature: When this feature is enabled in the admin settings, the FocusRO client app will be configured to start automatically whenever an employee’s system boots up.
- Once the auto-monitoring feature is activated by admin, FocusRO will initiate automatically each time the employee's computer is turned on or restarted. This ensures continuous monitoring without requiring manual intervention from the employee.
- And Employees will not have the option to disable or override the auto-start monitoring from their end. This ensures that monitoring remains consistent and that the system adheres to the specified administrative controls.
- By enabling auto-monitoring helps ensure that the client app is always running when employees are at their computers, improving accuracy in monitoring and reducing the likelihood of missed tracking or manual errors.
- To set up this feature, access the admin settings panel and enable the auto-monitoring option under settings. Once configured, ask your employee to restart FocusRO client app, then the FocusRO client app will be enforced to start automatically on system startup for all employees, providing seamless and uninterrupted monitoring.

¶ Auto-Break Close
As an administrator, you now have enhanced control over break management through the new auto-break close feature. Here’s a detailed overview:
Auto-Break Close Feature: By enabling the auto-break close option in the admin settings, you ensure that breaks are automatically ended under specific conditions.
If an employee begins working without manually switching from break mode to work mode in the client app, the auto-break close feature will detect this activity. The system will then automatically transition the employee out of break mode and into work mode.
This feature helps streamline workflow and ensures that breaks do not inadvertently extend beyond the intended duration, promoting better productivity and adherence to work schedules.
To activate this feature, navigate to the settings panel and enable the auto-break close option. Once enabled, ask your employees to restart FocusRO client app, then the system will handle break transitions automatically based on the employee’s work activity.
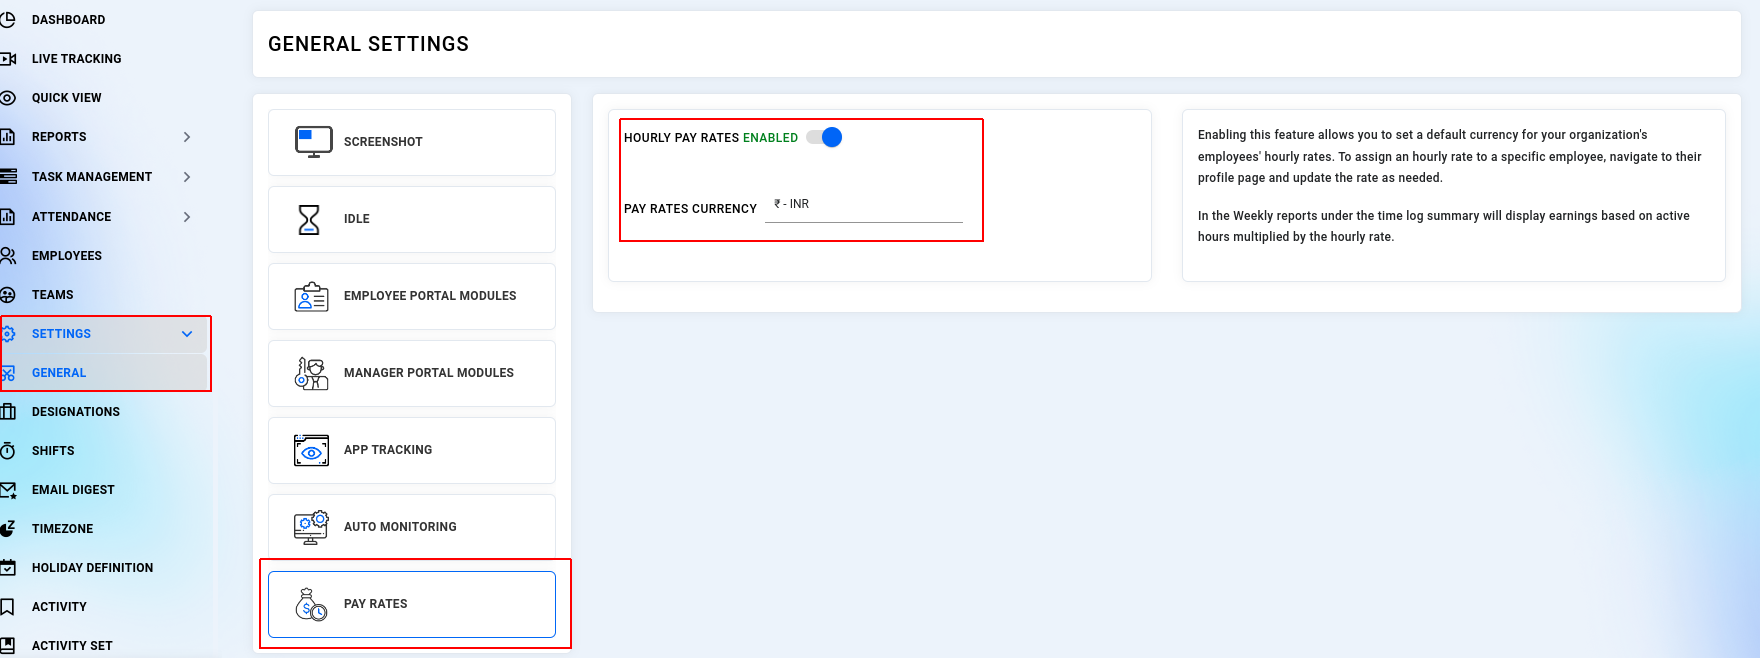
¶ Pay Rates
The hourly rate allows you to calculate employee earnings based on the number of hours worked, providing an accurate and flexible pay structure.
Hourly pay rate configuration
To configure the hourly rate for your organization's employees, follow these steps:
Navigate to settings:
- Go to Settings → General → Pay Rates.
Enable Hourly Rate Feature:
- By default, the hourly rate feature is disabled. To activate it, toggle the option to enable it. Enabling this feature allows you to set a default currency for all employees' hourly rates in your organization.
Assign Hourly Rates to Employees:
- Once enabled, you can assign specific hourly rates to individual employees. To do this, navigate to the employee’s profile page, and update the hourly rate as needed.
View Earnings in Weekly Reports:
- In the Weekly Reports, under the Time Log Summary, you’ll see earnings displayed based on the active hours worked by employees, multiplied by their assigned hourly rate.
Disabling the Feature:
- If you decide to disable the hourly rate feature, it will be removed from employee profile pages, and the hourly rate will no longer be available for assignment. Additionally, it will not appear in the time log reports or be factored into earnings.
By enabling this feature, you gain full control over employee compensation tracking based on hourly work, simplifying payroll management and report generation.
¶ DESIGNATIONS
¶ Add a designation
- Select the designation from the left navigation bar.
- Click “+Add designation” to add your organization's employees' designation.
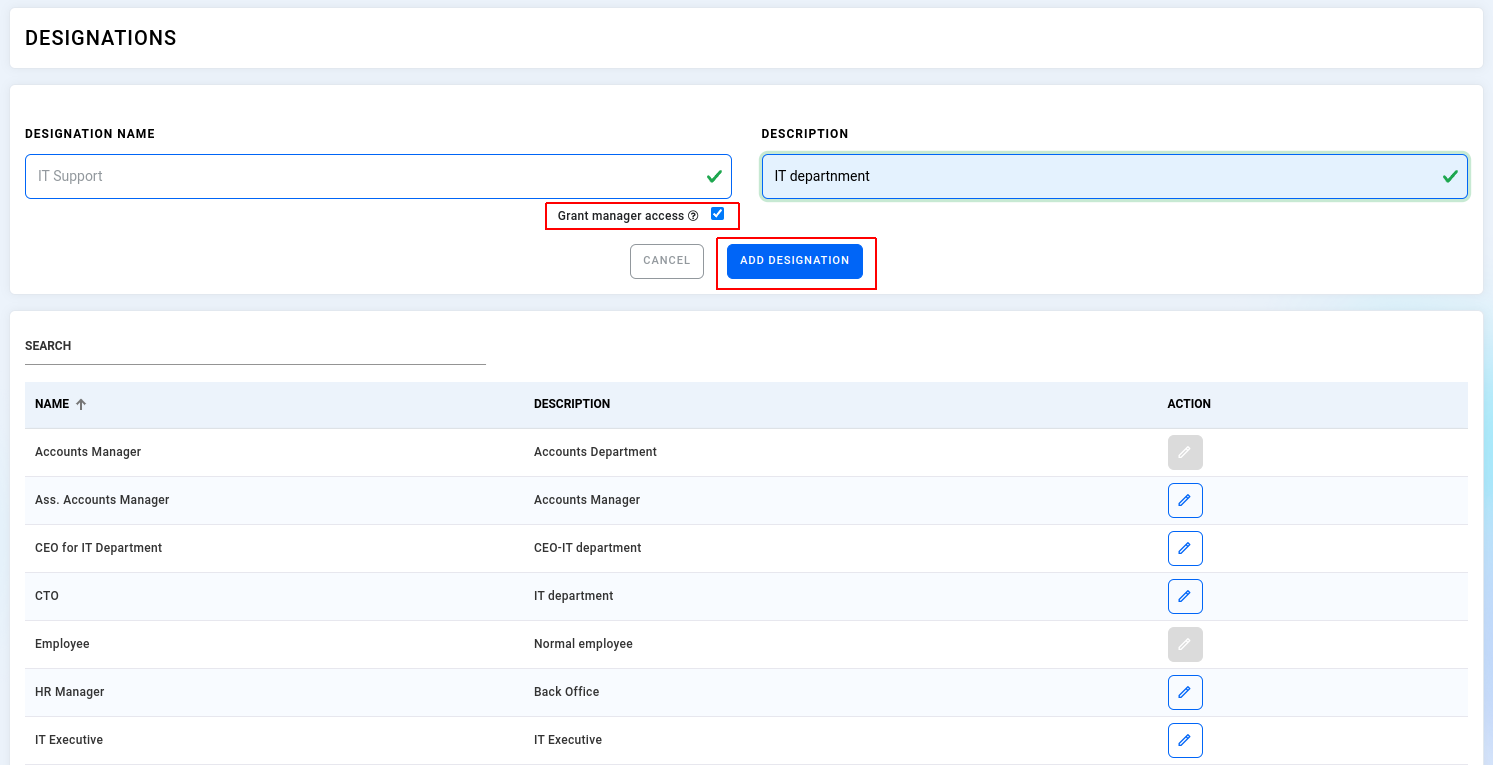
- You can see a popup window, feed the required details “Designation name” and "description" fields are mandatory.
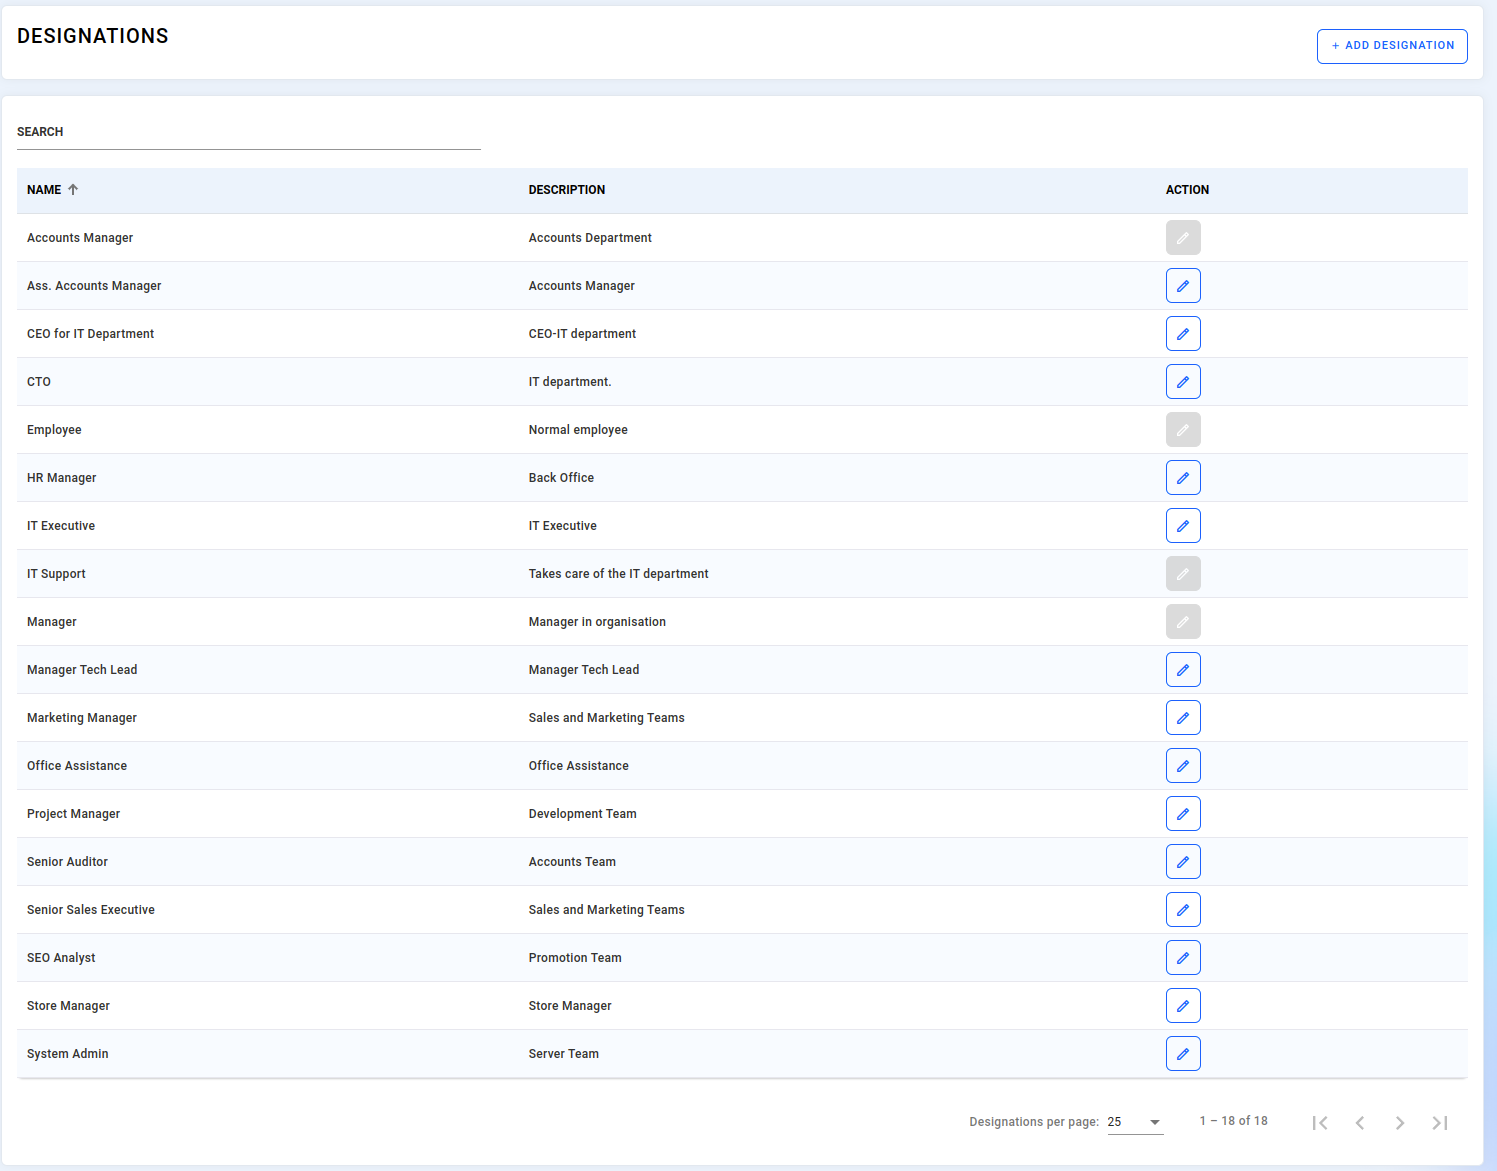
- Click the “Add designation” button to create a new designation.
- You have the option to “Grant manager access” to the custom designation.
- You can change the designation name using the "Edit" action option.
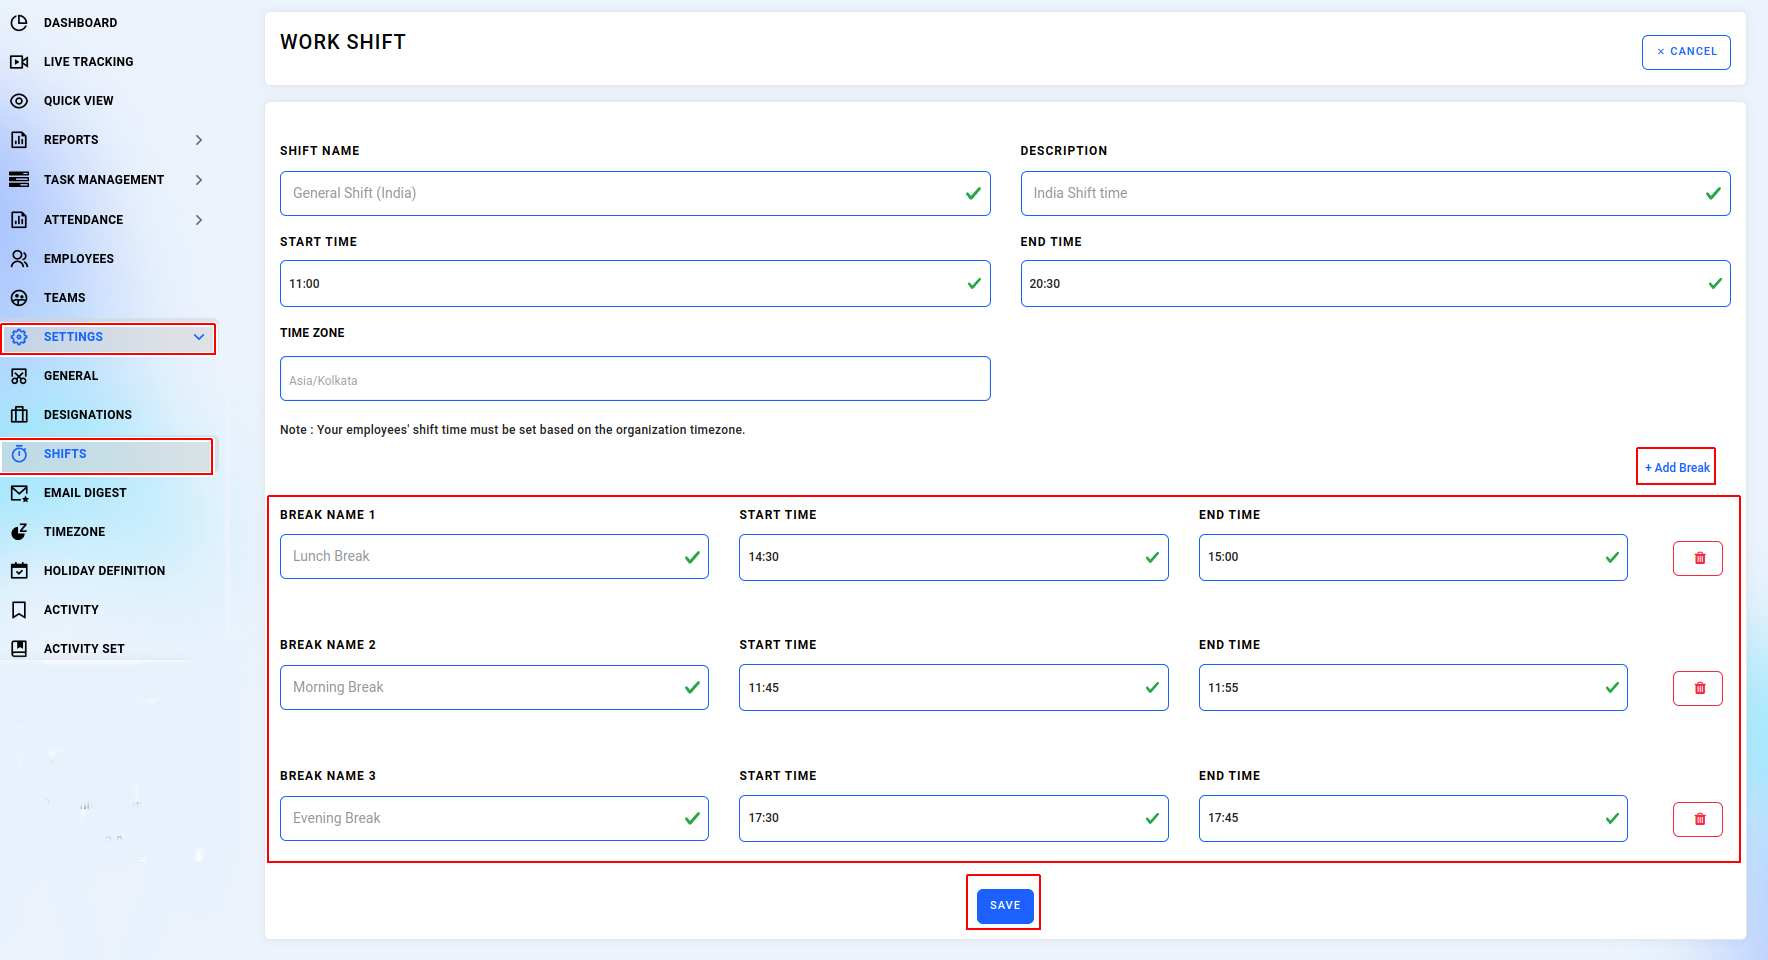
¶ SHIFTS
You can create work shifts for your employees within your organization.
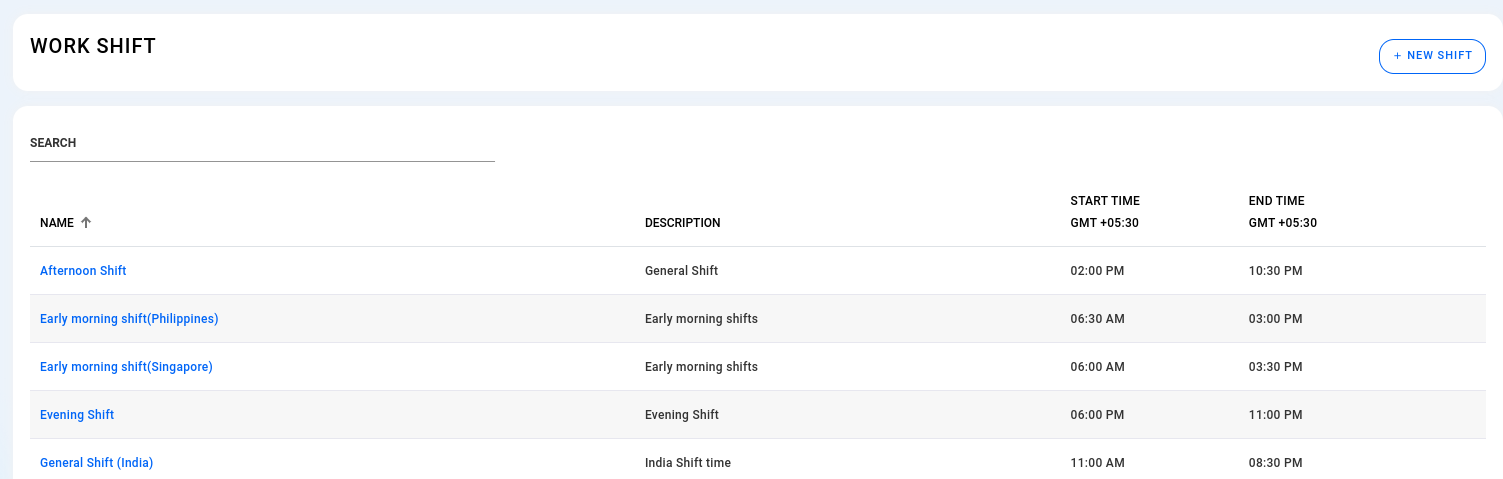
¶ Add a shift
- Select “shifts” from the left navigation bar.
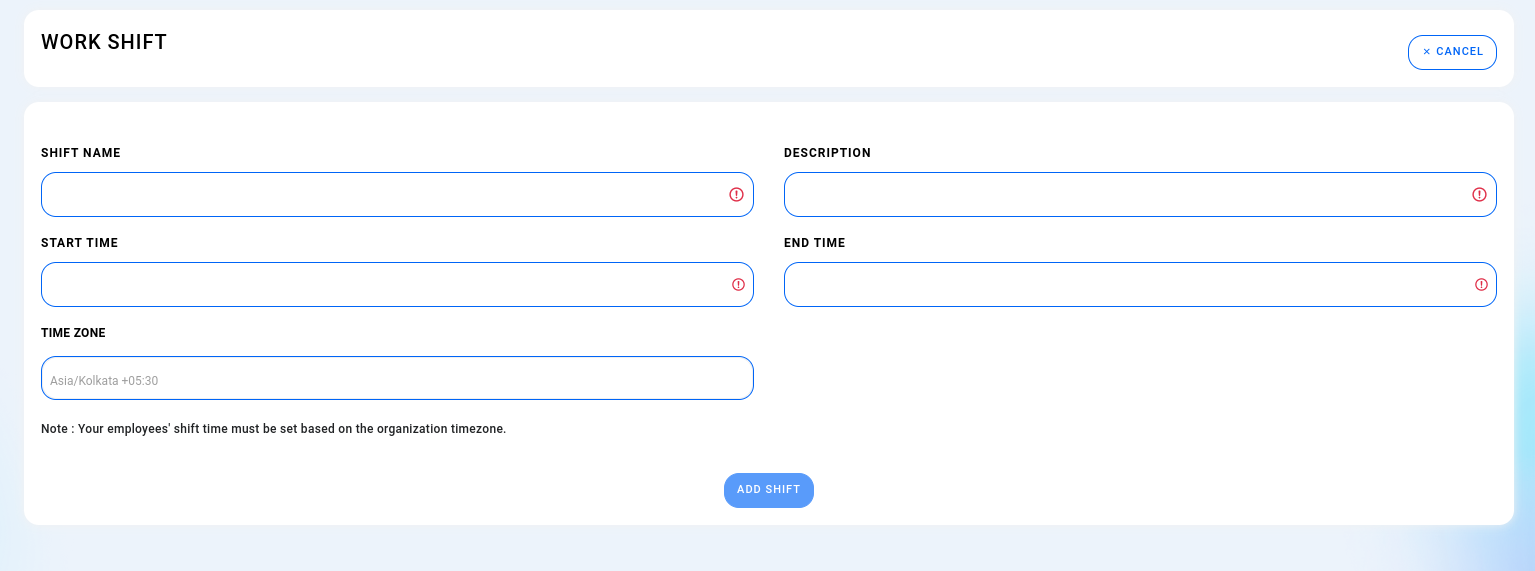
- Click the “+new shift” button to create a new shift.
- You can see a popup window, feed the required details “shit name” “description” and "shift start time and end time".
- Click the “add shift” button to save the details.
¶ Shift - Defined break
Admins can now specify break times for employees scheduled on particular shifts within the shift menu. The defined break details will be visible in the employee’s detailed report, allowing you to compare the scheduled breaks with the actual breaks taken. Additionally, if an employee takes a break that exceeds the defined break time, it will be highlighted in red in the report under passive hours.
¶ EMAIL DIGEST
You can receive comprehensive reports on employee activities, including daily and weekly reports on active and dormant employees across the company.
- Choose "Email Digest" from the left navigation bar.
- Opt for daily or weekly options to receive company-wide or team-wide reports to admin or managers.
- Select "Daily" to receive a daily report of each team member's activities.
- Customize the “Day and time” for receiving email digest reports
- Click on "Weekly" to obtain a weekly report of the team's activities.
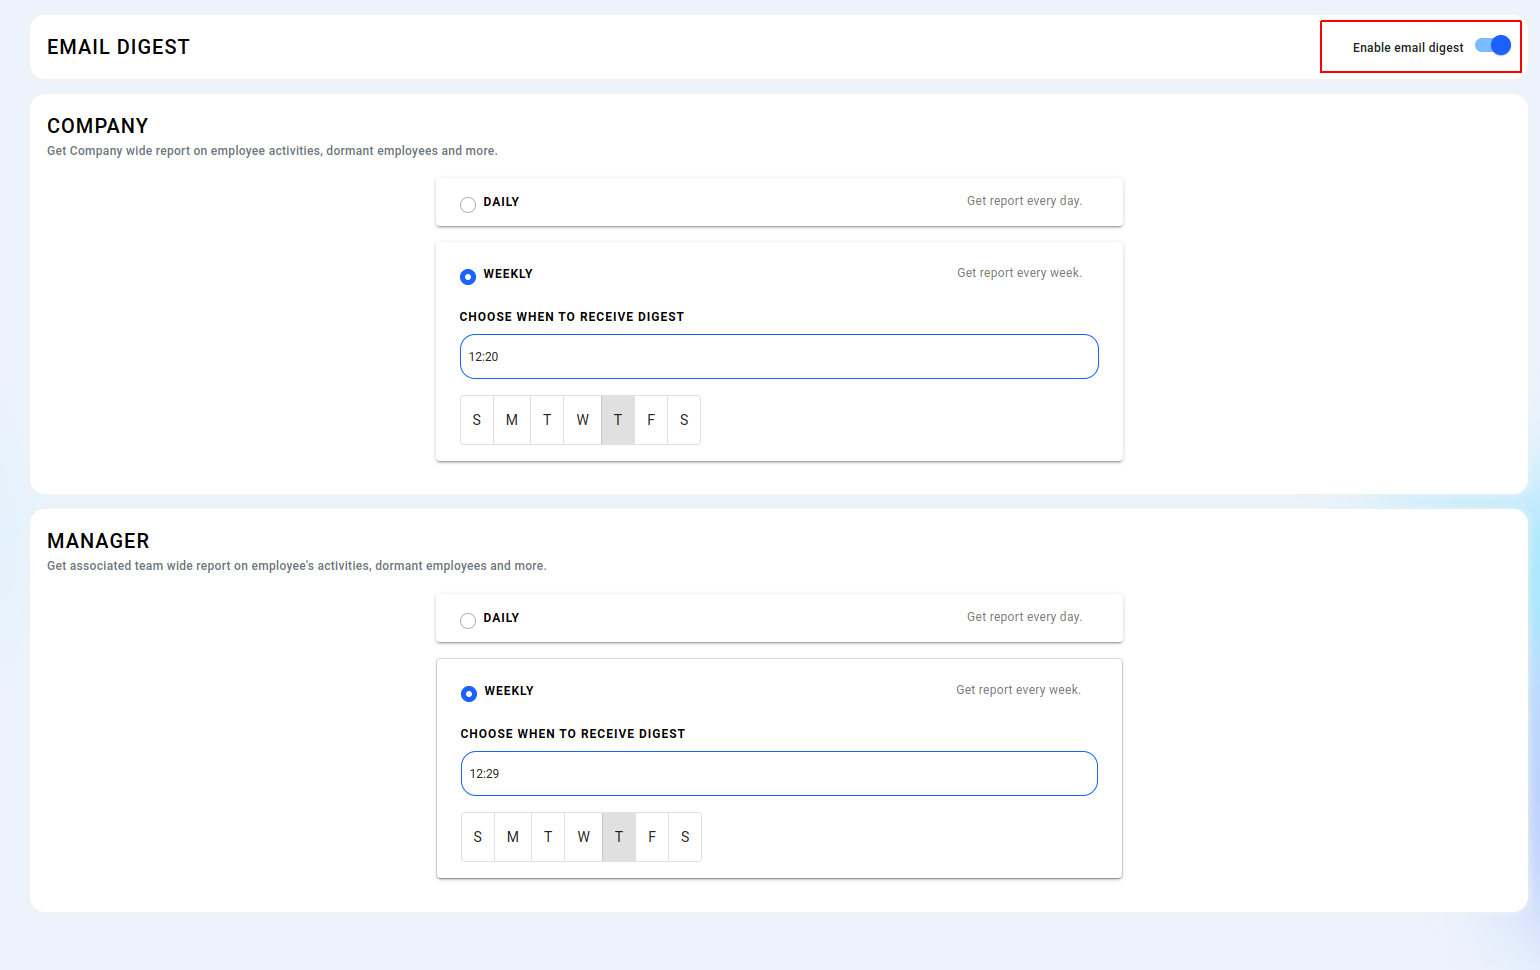
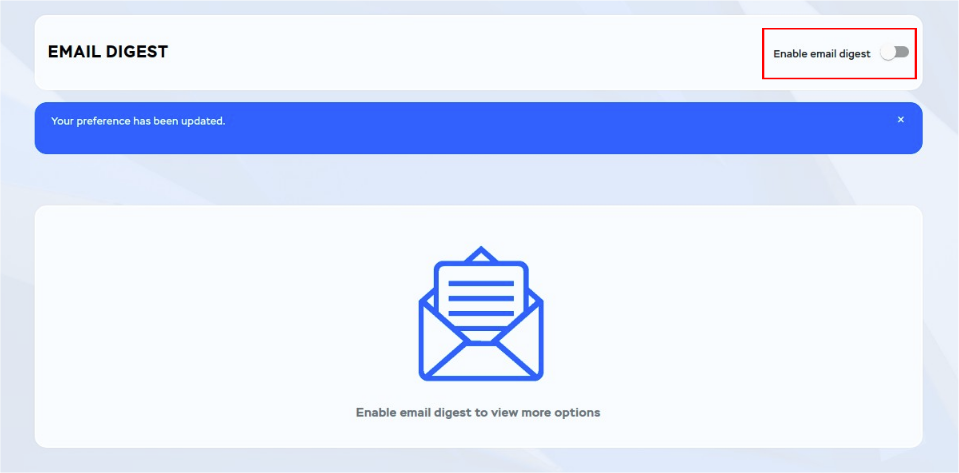
- If you "disable" the email digest feature. you will no longer receive email reports for organization-wide and team-wide activities.
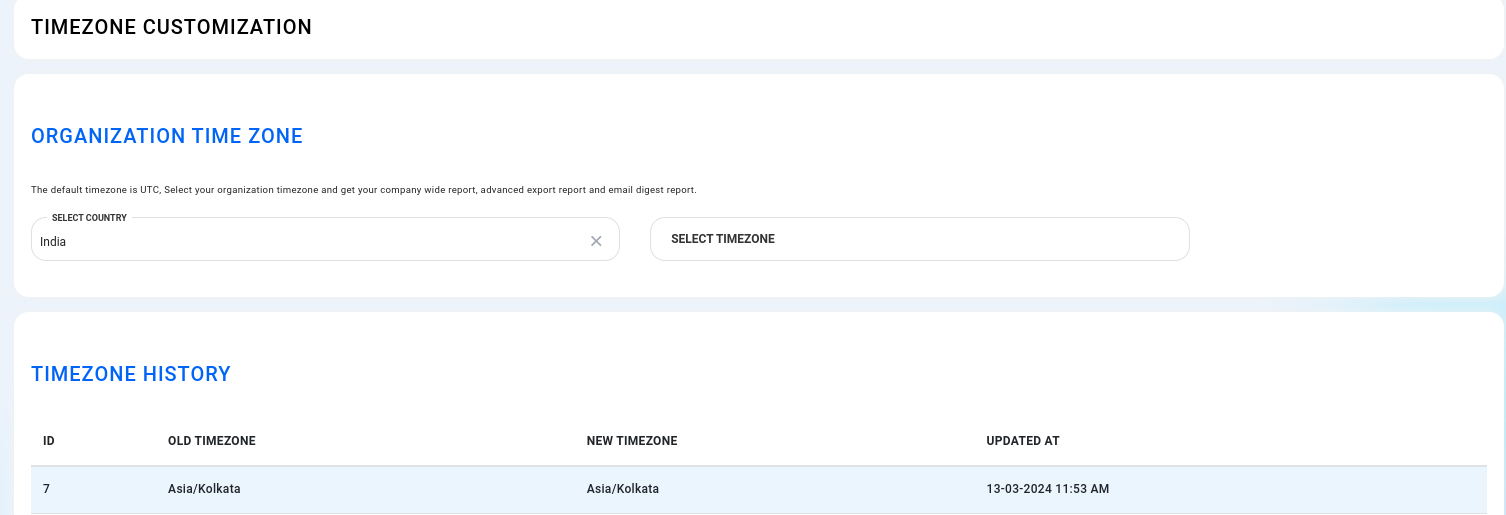
¶ TIMEZONE CUSTOMIZATION
The default timezone is UTC, Select your organization timezone and get your company-wide report, advanced export report, and email digest report.
¶ Timezone
- Select “Timezone” from the left navigation bar.
- Choose your "Country" and choose “Timezone” from the drop-down list.
- All reports will be changed to a selected timezone.
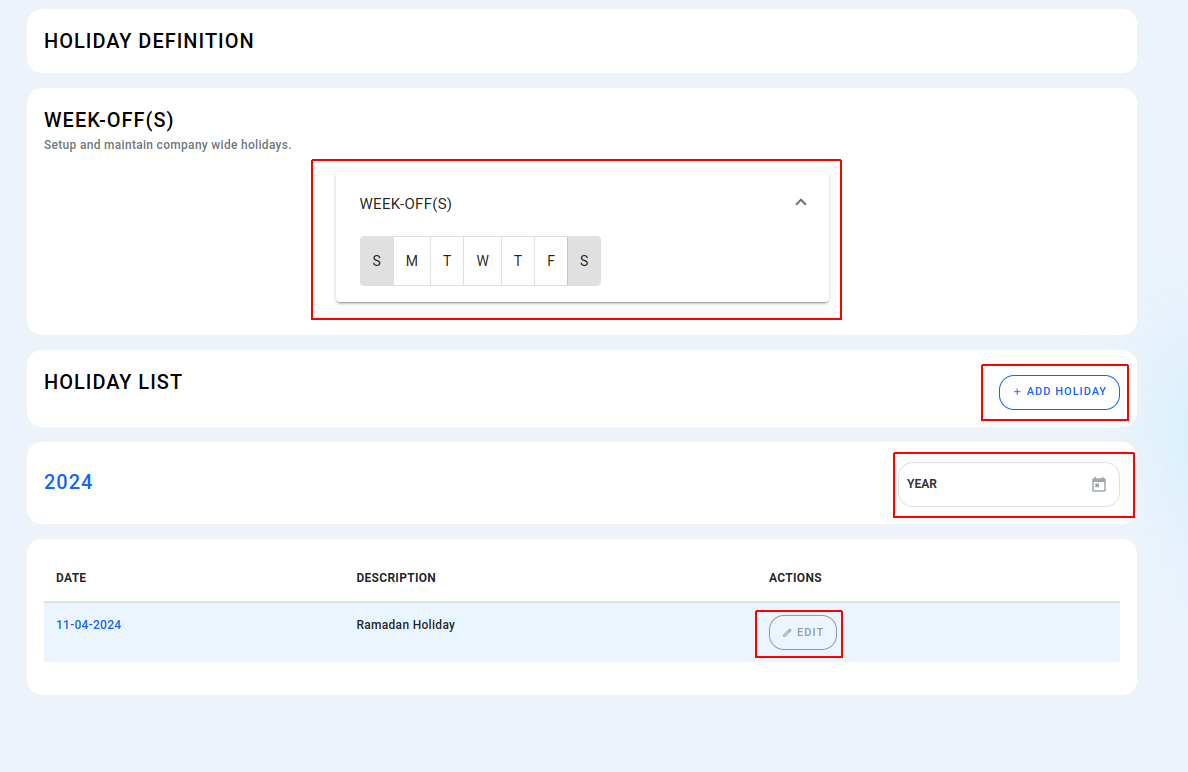
¶ HOLIDAY DEFINITION
You can customize and manage week-offs and holidays for your entire organization.
- You can customize the week off for only two days.
- You can add a holiday for all your employees across the entire organization.
- You have the option to edit previously created holidays.
¶ ACTIVITY
- The app activity of your organization's employees will commence syncing and updating under the "Activity" section.
- Any grouped activities will be displayed here under the activity set section.

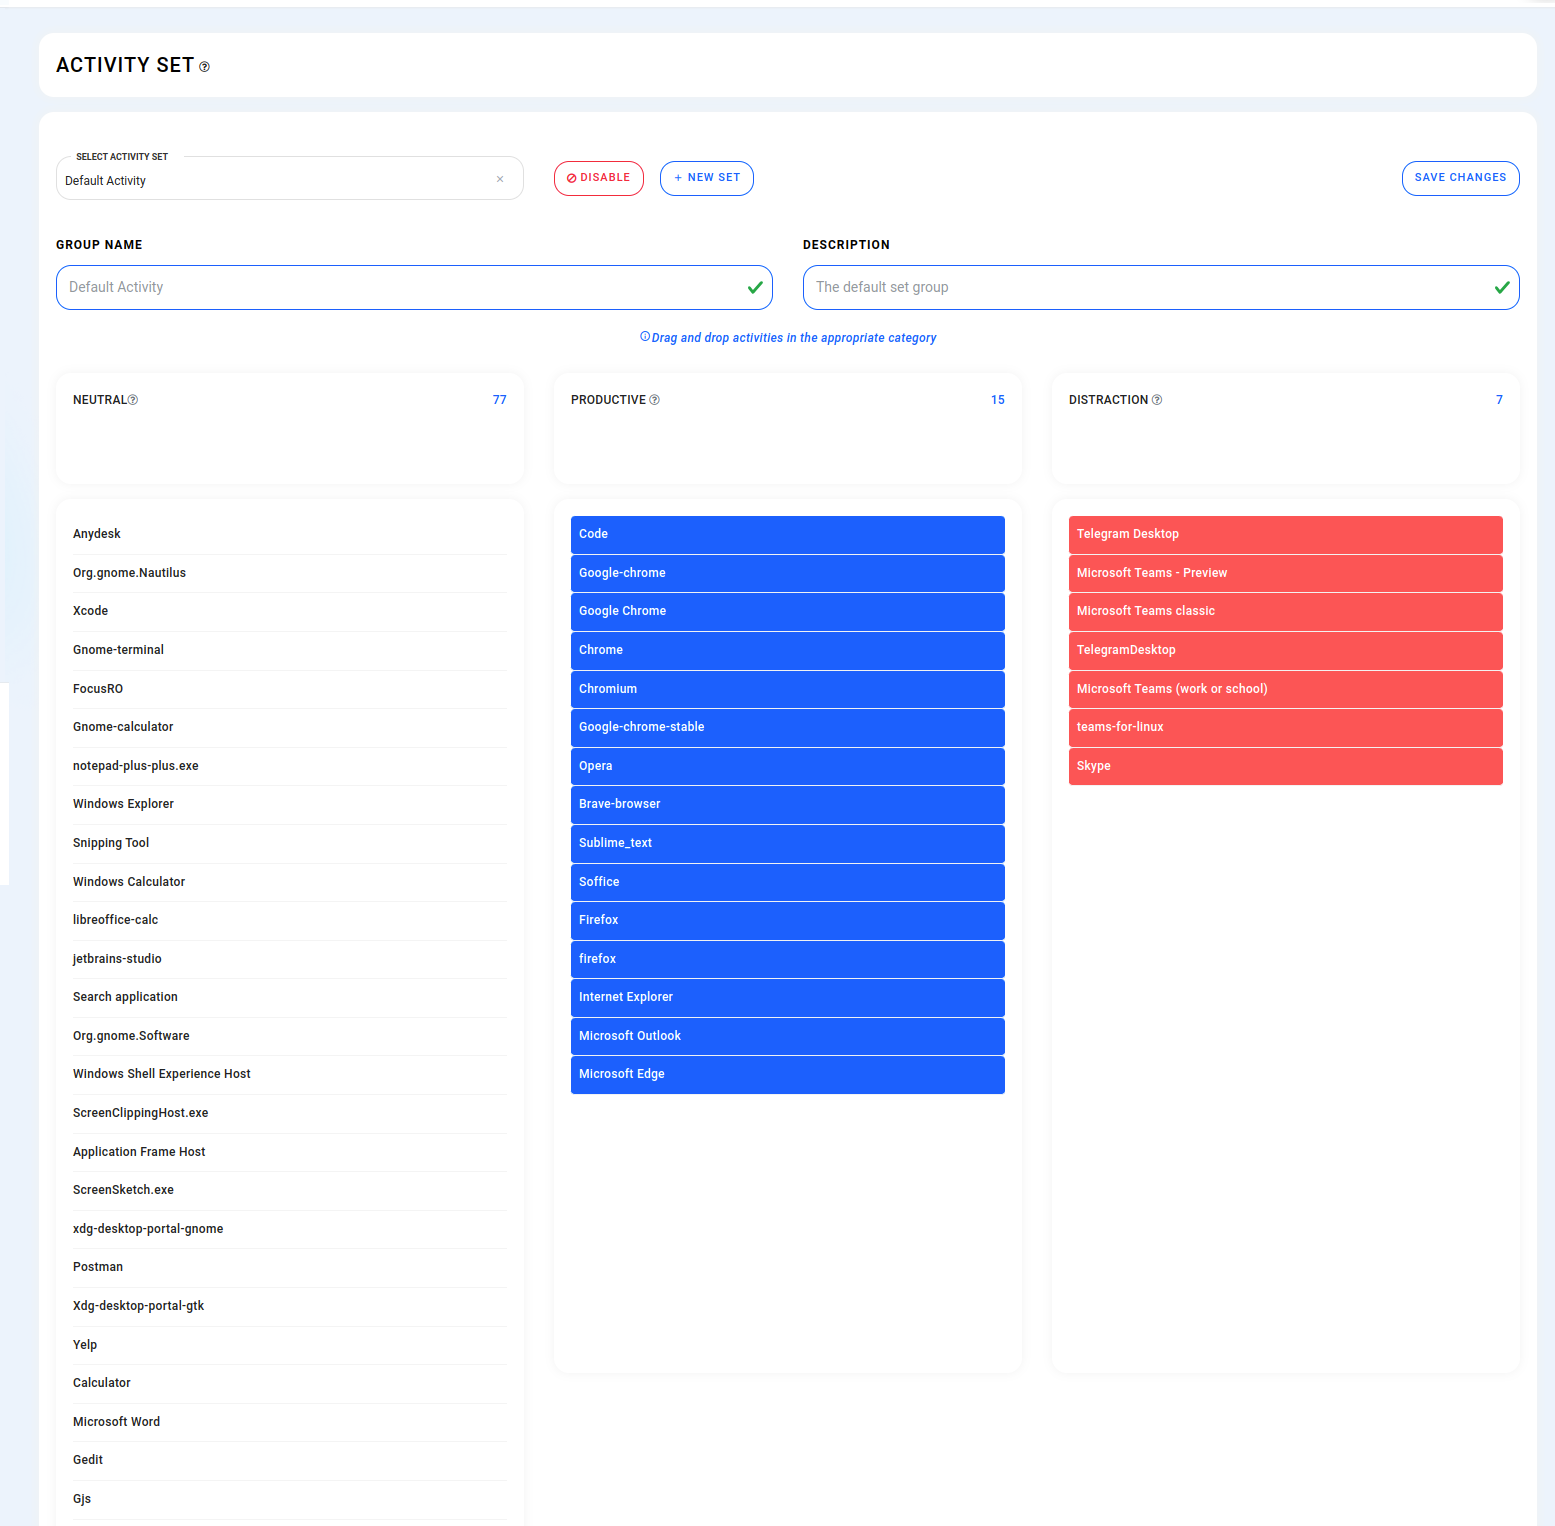
¶ ACTIVITY SET
- Your employee's app activity will begin syncing within the "Activity - Neutral" section. you can drag and drop particular activities under productive / distraction
- You can create a "New activity set" for grouping and assign it to a team or individual employee.